Graphics
Simple Usage Examples
Draw Circle Record
Concentric Ripple Effect with Colored Circles
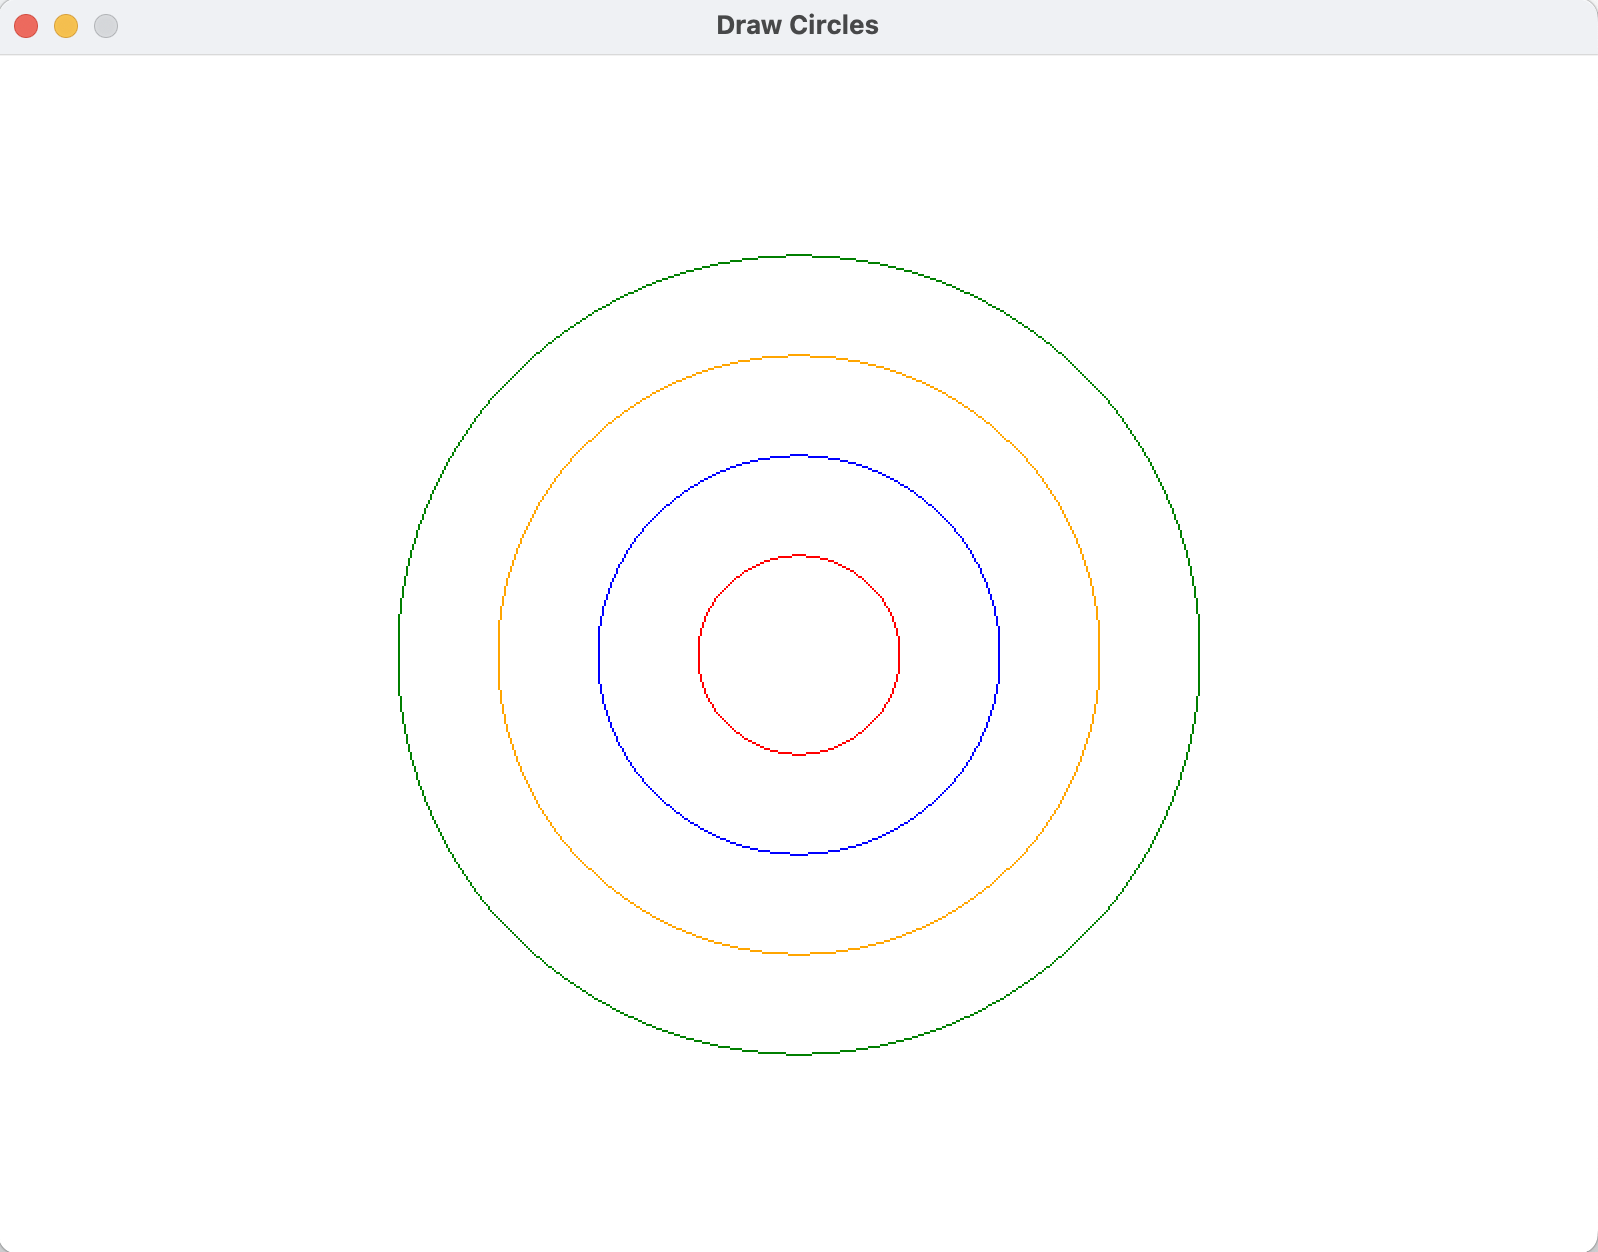
The following code shows examples of using Draw Circle to demonstrate how to draw a circle on the screen with different colors and radii, with and without using variables.
#include "splashkit.h"
int main(){    open_window("Draw Circles", 800, 600);
    // Create circles with different radii    circle circle1 = circle_at(screen_center(), 50);    circle circle2 = circle_at(screen_center(), 100);
    clear_screen();
    // Draw the circles with different colors    draw_circle(COLOR_RED, circle1);    draw_circle(COLOR_BLUE, circle2);    draw_circle(COLOR_ORANGE, circle_at(screen_center(), 150));    draw_circle(COLOR_GREEN, circle_at(screen_center(), 200));
    refresh_screen();
    delay(4000);    close_all_windows();
return 0;}using SplashKitSDK;using static SplashKitSDK.SplashKit;
OpenWindow("Draw Circles", 800, 600);
// Create circles with different radiiCircle circle1 = CircleAt(ScreenCenter(), 50);Circle circle2 = CircleAt(ScreenCenter(), 100);
ClearScreen();
// Draw the circles with different colorsDrawCircle(ColorRed(), circle1);DrawCircle(ColorBlue(), circle2);DrawCircle(ColorOrange(), CircleAt(ScreenCenter(), 150));DrawCircle(ColorGreen(), CircleAt(ScreenCenter(), 200));
RefreshScreen();
Delay(4000);CloseAllWindows();using SplashKitSDK;
namespace DrawCircleExample{ public class Program { public static void Main() { SplashKit.OpenWindow("Draw Circles", 800, 600);
// Create circles with different radii Circle circle1 = new Circle { Center = SplashKit.ScreenCenter(), Radius = 50 }; Circle circle2 = new Circle { Center = SplashKit.ScreenCenter(), Radius = 100 };
SplashKit.ClearScreen();
// Draw the circles with different colors circle1.Draw(Color.Red); circle2.Draw(Color.Blue); SplashKit.DrawCircle(Color.Orange, SplashKit.CircleAt(SplashKit.ScreenCenter(), 150)); SplashKit.DrawCircle(Color.Green, SplashKit.CircleAt(SplashKit.ScreenCenter(), 200 ));
SplashKit.RefreshScreen();
SplashKit.Delay(4000); SplashKit.CloseAllWindows(); } }}from splashkit import *
open_window("Draw Circles", 800, 600)
# Create circles with different radiicircle1 = circle_at(screen_center(), 50)circle2 = circle_at(screen_center(), 100)
clear_screen(color_white())
# Draw the circles with different colorsdraw_circle_record(color_red(), circle1)draw_circle_record(color_blue(), circle2)draw_circle_record(color_orange(), circle_at(screen_center(), 150))draw_circle_record(color_green(), circle_at(screen_center(), 200))
refresh_screen()
delay(4000)close_all_windows()Output:
Draw Circle On Bitmap
Creating a Red Planet
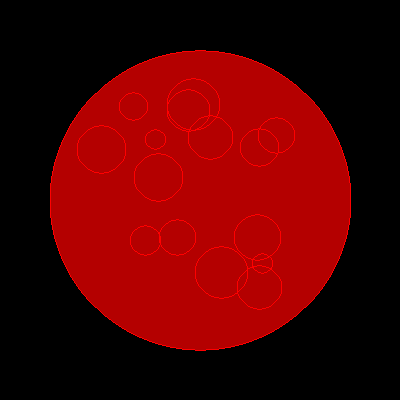
The following code demonstrates how to use Draw Circle On Bitmap to create a red planet with surface details using multiple circles.
#include "splashkit.h"
int main(){    // Create a Window and bitmap for the map    window window = open_window("Window", 400, 400);    bitmap planet = create_bitmap("planet", 400, 400);
    // Fill background with dark color    clear_bitmap(planet, COLOR_BLACK);
    // Create color    color red = COLOR_RED;
    // Draw the main planet circle    fill_circle_on_bitmap(planet, rgba_color(180, 0, 0, 255), 200, 200, 150);    draw_circle_on_bitmap(planet, red, 200, 200, 150);
    // Add some surface details with smaller circles    for(int i = 0; i < 15; i++)    {        double x = rnd(100, 300);  // Random between 100 and 300        double y = rnd(100, 300);  // Random between 100 and 300        double size = rnd(10, 30); // Random between 10 and 30        draw_circle_on_bitmap(planet, red, x, y, size);    }
    while (!window_close_requested(window))    {        process_events();        // Draw the bitmap to the window        draw_bitmap(planet, 0, 0);        refresh_screen();    }
free_bitmap(planet); close_all_windows(); return 0;}using static SplashKitSDK.SplashKit;using SplashKitSDK;
// Create a Window and bitmap for the mapWindow window = OpenWindow("Window", 400, 400);Bitmap bitmap = CreateBitmap("planet", 400, 400);
// Fill background with dark colorClearBitmap(bitmap, ColorBlack());// Create colorColor red = ColorRed();
// Draw the main planet circleFillCircleOnBitmap(bitmap, RGBAColor(180, 0, 0, 255), 200, 200, 150);DrawCircleOnBitmap(bitmap, red, 200, 200, 150);
// Add some surface details with smaller circlesfor (int i = 0; i < 15; i++){ double x = Rnd(100, 300); // Random between 100 and 300 double y = Rnd(100, 300); // Random between 100 and 300 double size = Rnd(10, 30); // Random between 10 and 30 DrawCircleOnBitmap(bitmap, red, x, y, size);}while (!window.CloseRequested){ ProcessEvents(); // Draw the bitmap to the current window DrawBitmap(bitmap, 0, 0); RefreshScreen();}FreeBitmap(bitmap);CloseAllWindows();using SplashKitSDK;
namespace DrawCircleOnBitmap{ public class Program { public static void Main() { // Create a Window and bitmap for the map Window window = new Window("Window", 400, 400); Bitmap bitmap = new Bitmap("planet", 400, 400);
// Fill background with dark color bitmap.Clear(Color.Black);
// Create color Color red = Color.Red;
// Draw the main planet circle bitmap.FillCircle(Color.RGBAColor(180, 0, 0, 255), 200, 200, 150); bitmap.DrawCircle(red, 200, 200, 150);
// Add some surface details with smaller circles for (int i = 0; i < 15; i++) { double x = SplashKit.Rnd(100, 300); // Random between 100 and 300 double y = SplashKit.Rnd(100, 300); // Random between 100 and 300 double size = SplashKit.Rnd(10, 30); // Random between 10 and 30 bitmap.DrawCircle(red, x, y, size); } while (!window.CloseRequested) { SplashKit.ProcessEvents(); // Draw the bitmap to the window window.DrawBitmap(bitmap, 0, 0); SplashKit.RefreshScreen(); } bitmap.Free(); SplashKit.CloseAllWindows(); } }}from splashkit import *
# Create a Window and bitmap for the mapwindow = open_window("Window", 400, 400)planet = create_bitmap("planet", 400, 400)
# Fill background with dark colorclear_bitmap(planet, color_black())
# Create colorred = color_red()
# Draw the main planet circlefill_circle_on_bitmap(planet, rgba_color(180, 0, 0, 255), 200, 200, 150)draw_circle_on_bitmap(planet, red, 200, 200, 150)
# Add some surface details with smaller circlesfor i in range(15): x = rnd_range(100, 300) # Random between 100 and 300 y = rnd_range(100, 300) # Random between 100 and 300 size = rnd_range(10, 30) # Random between 10 and 30 draw_circle_on_bitmap(planet, red, x, y, size)
while not window_close_requested(window): process_events() # Draw the bitmap to the window draw_bitmap(planet, 0, 0) refresh_screen()
free_bitmap(planet)close_all_windows()Output:
Fill Circle
Basic Blue Circle
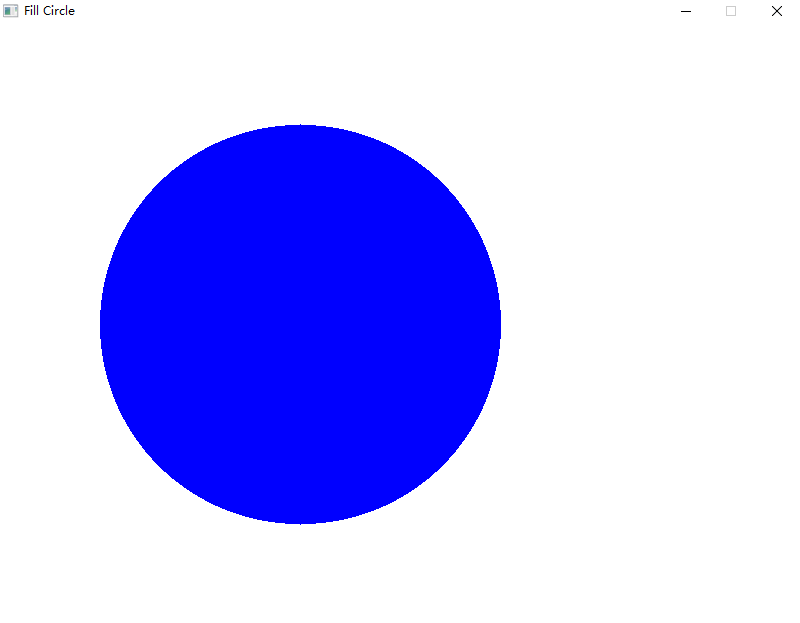
The following code shows examples of using Fill Circle to show how to draw a filled-in blue circle.
#include "splashkit.h"
int main(){    open_window("Fill Circle", 800, 600);
    clear_screen();    fill_circle(COLOR_BLUE, 300, 300, 200);    refresh_screen();
    delay(4000);
    close_all_windows();
return 0;}using static SplashKitSDK.SplashKit;
OpenWindow("Fill Circle", 800, 600);
ClearScreen();FillCircle(ColorBlue(), 300, 300, 200);RefreshScreen();
Delay(4000);
CloseAllWindows();using SplashKitSDK;
namespace FillCircleExample{ public class Program { public static void Main() { SplashKit.OpenWindow("Fill Circle", 800, 600);
SplashKit.ClearScreen(); SplashKit.FillCircle(Color.Blue, 300, 300, 200); SplashKit.RefreshScreen();
SplashKit.Delay(4000);
SplashKit.CloseAllWindows(); } }}from splashkit import *
open_window("Fill Circle", 800, 600)
clear_screen(color_white())
fill_circle(color_blue(), 300, 300, 200)refresh_screen()delay(4000)
close_all_windows()Output:
Fill Circle On Window
Traffic Lights
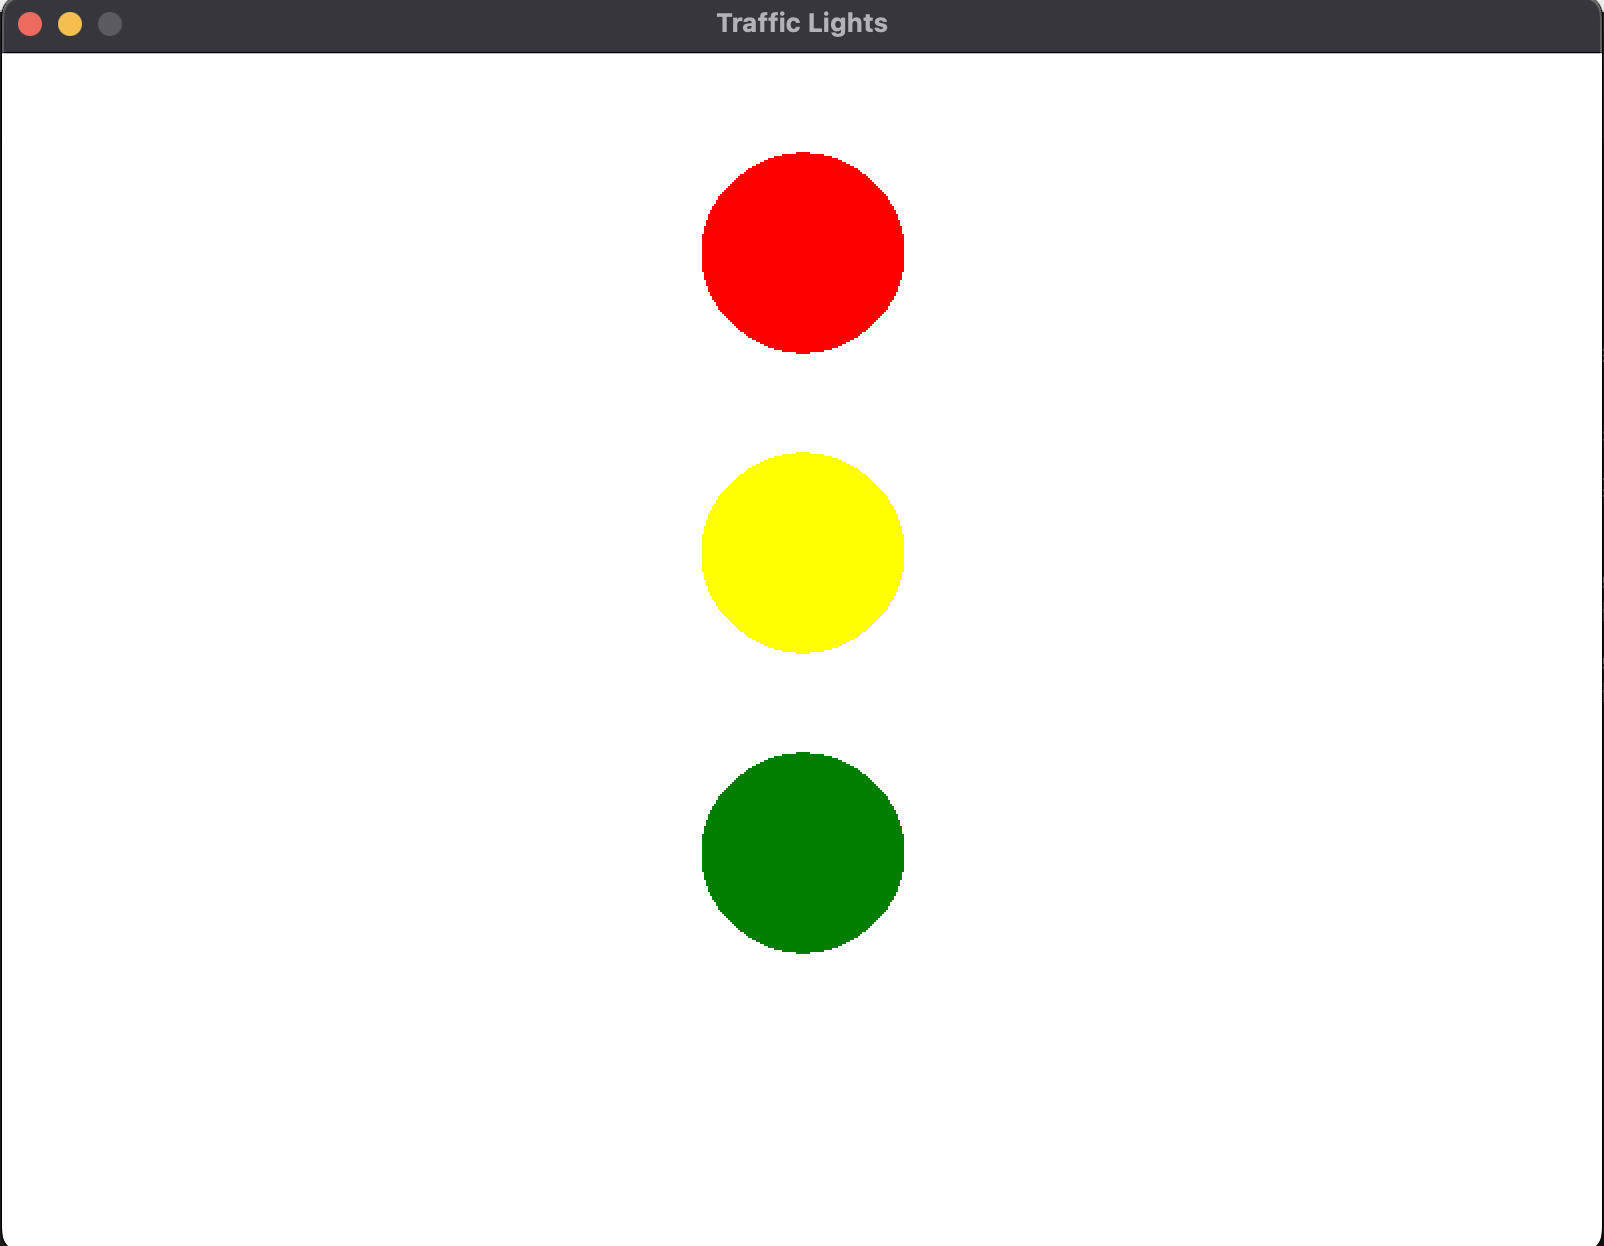
The following code shows an example of using Fill Circle On Window to display three circles of different colors and placement in a specified window to look like traffic lights.
#include "splashkit.h"
int main(){    // Open a new window and initialize to a window variable    window window = open_window("Traffic Lights", 800, 600);
    clear_screen(COLOR_WHITE);
    // Use function to place 3 circles in destination window as traffic lights    fill_circle_on_window(window, COLOR_RED, 400, 100, 50);    fill_circle_on_window(window, COLOR_YELLOW, 400, 250, 50);    fill_circle_on_window(window, COLOR_GREEN, 400, 400, 50);
    refresh_screen();    delay(5000);
// Close all windows close_all_windows();}using static SplashKitSDK.SplashKit;
// Open a new window and initialize to a window variableSplashKitSDK.Window window = OpenWindow("Traffic Lights", 800, 600);
ClearScreen(ColorWhite());
// Use function to place 3 circles in destination window as traffic lightsFillCircleOnWindow(window, ColorRed(), 400, 100, 50);FillCircleOnWindow(window, ColorYellow(), 400, 250, 50);FillCircleOnWindow(window, ColorGreen(), 400, 400, 50);
RefreshScreen();Delay(5000);
// Close all windowsCloseAllWindows();using SplashKitSDK;
namespace FillCircleOnWindowExample{ public class Program { public static void Main() { // Open a new window and initialize to a window variable Window window = SplashKit.OpenWindow("Traffic Lights", 800, 600);
window.Clear(Color.White);
// Use function to place 3 circles in destination window as traffic lights window.FillCircle(Color.Red, 400, 100, 50); window.FillCircle(Color.Yellow, 400, 250, 50); window.FillCircle(Color.Green, 400, 400, 50);
window.Refresh(); SplashKit.Delay(5000);
// Close loaded window window.Close();
} }}from splashkit import *
# Open a new window and initialize to a window variablewindow = open_window("Traffic Lights", 800, 600)
clear_screen(color_white())
# Use function to place 3 circles in destination window as traffic lightsfill_circle_on_window(window, color_red(), 400, 100, 50)fill_circle_on_window(window, color_yellow(), 400, 250, 50)fill_circle_on_window(window, color_green(), 400, 400, 50)
refresh_screen()delay(5000)
# Close all windowsclose_all_windows()Output:
Fill Ellipse
Basic Blue Ellipse
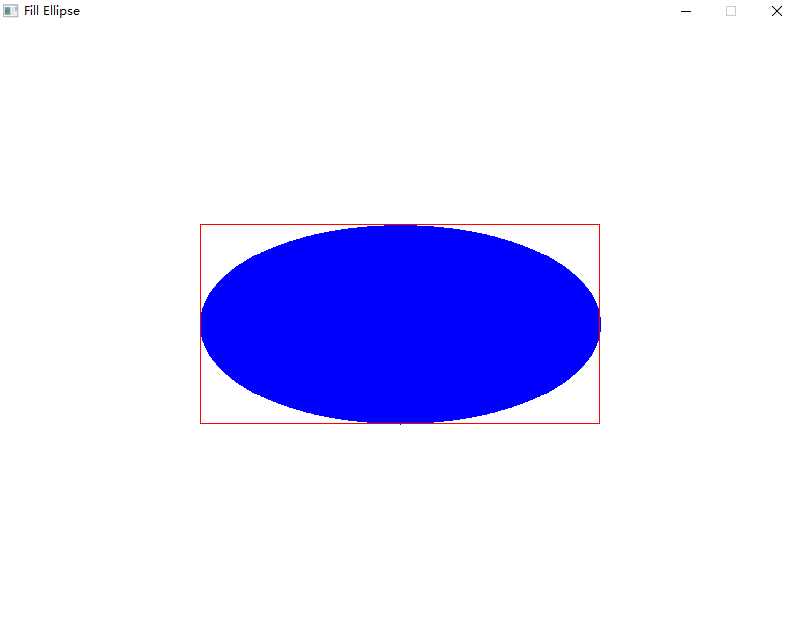
The following code shows examples of using Fill Ellipse to show how to draw a filled-in blue ellipse.
#include "splashkit.h"
int main(){    open_window("Fill Ellipse", 800, 600);
    clear_screen();    fill_ellipse(COLOR_BLUE, 200, 200, 400, 200);    // Added rectangle with same arguments as above for x, y, width and height    draw_rectangle(COLOR_RED, 200, 200, 400, 200);    refresh_screen();
    delay(4000);    close_all_windows();
return 0;}using static SplashKitSDK.SplashKit;
OpenWindow("Fill Ellipse", 800, 600);
ClearScreen();FillEllipse(ColorBlue(), 200, 200, 400, 200);// Added rectangle with same arguments as above for x, y, width and heightDrawRectangle(ColorRed(), 200, 200, 400, 200);RefreshScreen();
Delay(4000);CloseAllWindows();using SplashKitSDK;
namespace FillEllipseExample{ public class Program { public static void Main() { SplashKit.OpenWindow("Fill Ellipse", 800, 600);
SplashKit.ClearScreen(); SplashKit.FillEllipse(Color.Blue, 200, 200, 400, 200); // Added a rectangle with the same arguments as above for x, y, width, and height SplashKit.DrawRectangle(Color.Red, 200, 200, 400, 200); SplashKit.RefreshScreen();
SplashKit.Delay(4000); SplashKit.CloseAllWindows(); } }}from splashkit import *
open_window("Fill Ellipse", 800, 600)
clear_screen(color_white())
fill_ellipse(color_blue(), 200, 200, 400, 200)# Added a rectangle with the same arguments as above for x, y, width, and heightdraw_rectangle(color_red(), 200, 200, 400, 200)refresh_screen()
delay(4000)close_all_windows()Output:
Clover Drawing
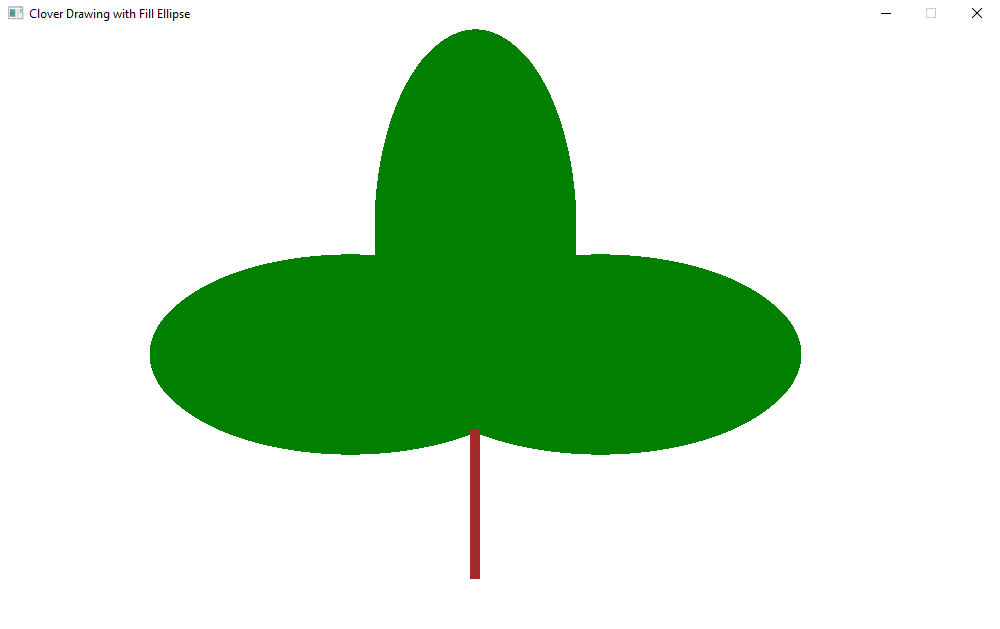
The following code shows an example of using Fill Ellipse with different dimensions to draw a three-leaf clover.
#include "splashkit.h"
int main(){    open_window("Clover Drawing with Fill Ellipse", 1000, 600);
    clear_screen();    fill_ellipse(COLOR_GREEN, 150, 225, 400, 200);    fill_ellipse(COLOR_GREEN, 375, 0, 200, 400);    fill_ellipse(COLOR_GREEN, 400, 225, 400, 200);    fill_rectangle(COLOR_BROWN, 470, 400, 10, 150);    refresh_screen();
    delay(4000);
    close_all_windows();
return 0;}using static SplashKitSDK.SplashKit;
OpenWindow("Clover Drawing with Fill Ellipse", 1000, 600);
ClearScreen();FillEllipse(ColorGreen(), 150, 225, 400, 200);FillEllipse(ColorGreen(), 375, 0, 200, 400);FillEllipse(ColorGreen(), 400, 225, 400, 200);FillRectangle(ColorBrown(), 470, 400, 10, 150);RefreshScreen();
Delay(4000);
CloseAllWindows();using SplashKitSDK;
namespace CloverDrawing{ public class CloverDrawing { public static void Main() { SplashKit.OpenWindow("Clover Drawing with Fill Ellipse", 1000, 600);
SplashKit.ClearScreen(); SplashKit.FillEllipse(Color.Green, 150, 225, 400, 200); SplashKit.FillEllipse(Color.Green, 375, 0, 200, 400); SplashKit.FillEllipse(Color.Green, 400, 225, 400, 200); SplashKit.FillRectangle(Color.Brown, 470, 400, 10, 150); SplashKit.RefreshScreen();
SplashKit.Delay(4000);
SplashKit.CloseAllWindows(); } }}from splashkit import *
open_window("Clover Drawing with Fill Ellipse", 1000, 600)
clear_screen(color_white())
fill_ellipse(color_green(), 150, 225, 400, 200)fill_ellipse(color_green(), 375, 0, 200, 400)fill_ellipse(color_green(), 400, 225, 400, 200)fill_rectangle(color_brown(), 470, 400, 10, 150)refresh_screen()
delay(4000)
close_all_windows()Output:
Fill Ellipse On Bitmap
Creating Water Ripples
The following code demonstrates how to use Fill Ellipse On Bitmap to create a water ripple effect using concentric ellipses with varying transparency.
#include "splashkit.h"
int main(){    // Create a window and bitmap for the water surface    window window = open_window("Window", 400, 300);    bitmap bitmap = create_bitmap("water", 400, 300);
    // Fill background with light blue    clear_bitmap(bitmap, rgba_color(200, 230, 255, 255));
    // Create different blue tones for ripples (from most opaque to most transparent)    color ripple_colors[] = {        rgba_color(100, 150, 255, 100),        rgba_color(120, 170, 255, 80),        rgba_color(140, 190, 255, 60),        rgba_color(160, 210, 255, 40),        rgba_color(180, 230, 255, 20)    };
    // Create ripple effect with concentric ellipses    double center_x = 200;  // Center of the bitmap    double center_y = 150;    for(int i = 0; i < 5; i++)    {        // Larger ellipses with decreasing size from center        fill_ellipse_on_bitmap(bitmap, ripple_colors[i],                             center_x - (100 + i*30),  // x gets further from center                             center_y - (75 + i*20),   // y gets further from center                             200 + i*60,               // width increases for outer ripples                             150 + i*40);              // height increases for outer ripples    }
    while (!window_close_requested(window))    {        process_events();        // Draw the bitmap to the window        draw_bitmap(bitmap, 0, 0);        refresh_screen();    }
free_bitmap(bitmap); close_all_windows(); return 0;}using static SplashKitSDK.SplashKit;using SplashKitSDK;
// Create a window and bitmap for the water surfaceWindow window = OpenWindow("Window", 400, 300);Bitmap bitmap = CreateBitmap("water", 400, 300);
// Fill background with light blueClearBitmap(bitmap, RGBAColor(200, 230, 255, 255));
// Create different blue tones for ripples (from most opaque to most transparent)Color[] rippleColors = { RGBAColor(100, 150, 255, 100), RGBAColor(120, 170, 255, 80), RGBAColor(140, 190, 255, 60), RGBAColor(160, 210, 255, 40), RGBAColor(180, 230, 255, 20)};
// Create ripple effect with concentric ellipsesdouble centerX = 200; // Center of the bitmapdouble centerY = 150;for (int i = 0; i < rippleColors.Length; i++){ // Larger ellipses with decreasing size from center FillEllipseOnBitmap(bitmap, rippleColors[i], centerX - (100 + i * 30), // x gets further from center centerY - (75 + i * 20), // y gets further from center 200 + i * 60, // width increases for outer ripples 150 + i * 40); // height increases for outer ripples}
while (!WindowCloseRequested(window)){ ProcessEvents(); // Draw the bitmap to the window DrawBitmap(bitmap, 0, 0); RefreshScreen();}
FreeBitmap(bitmap);CloseAllWindows();using SplashKitSDK;
namespace FillEllipseOnBitmap{ public class Program { public static void Main() { // Create a window and bitmap for the water surface Window window = new Window("Window", 400, 300); Bitmap bitmap = new Bitmap("water", 400, 300);
// Fill background with light blue bitmap.Clear(Color.RGBAColor(200, 230, 255, 255));
// Create different blue tones for ripples (from most opaque to most transparent) Color[] rippleColors = { Color.RGBAColor(100, 150, 255, 100), Color.RGBAColor(120, 170, 255, 80), Color.RGBAColor(140, 190, 255, 60), Color.RGBAColor(160, 210, 255, 40), Color.RGBAColor(180, 230, 255, 20) };
// Create ripple effect with concentric ellipses double centerX = 200; // Center of the bitmap double centerY = 150; for (int i = 0; i < rippleColors.Length; i++) { // Larger ellipses with decreasing size from center bitmap.FillEllipse(rippleColors[i], centerX - (100 + i * 30), // x gets further from center centerY - (75 + i * 20), // y gets further from center 200 + i * 60, // width increases for outer ripples 150 + i * 40); // height increases for outer ripples }
while (!window.CloseRequested) { SplashKit.ProcessEvents(); // Draw the bitmap to the window window.DrawBitmap(bitmap, 0, 0); SplashKit.RefreshScreen(); }
bitmap.Free(); SplashKit.CloseAllWindows(); } }}from splashkit import *
# Create a window and bitmap for the water surfacewindow = open_window("Window", 400, 300)bitmap = create_bitmap("water", 400, 300)
# Fill background with light blueclear_bitmap(bitmap, rgba_color(200, 230, 255, 255))
# Create different blue tones for ripples (from most opaque to most transparent)ripple_colors = [ rgba_color(100, 150, 255, 100), rgba_color(120, 170, 255, 80), rgba_color(140, 190, 255, 60), rgba_color(160, 210, 255, 40), rgba_color(180, 230, 255, 20)]
# Create ripple effect with concentric ellipsescenter_x = 200 # Center of the bitmapcenter_y = 150for i in range(5): # Larger ellipses with decreasing size from center fill_ellipse_on_bitmap(bitmap, ripple_colors[i], center_x - (100 + i*30), # x gets further from center center_y - (75 + i*20), # y gets further from center 200 + i*60, # width increases for outer ripples 150 + i*40) # height increases for outer ripples
while not window_close_requested(window): process_events() # Draw the bitmap to the window draw_bitmap(bitmap, 0, 0) refresh_screen()
free_bitmap(bitmap)close_all_windows()Output:

Clear Screen
Background Color
The following code shows an example of using Clear Screen to change the background color to blue.
#include "splashkit.h"
int main(){    open_window("Blue Background", 800, 600);
    //Use Clear Screen to change the background color to blue    clear_screen(COLOR_BLUE);
    refresh_screen(60);    delay(4000);    close_all_windows();
return 0;}using static SplashKitSDK.SplashKit;
OpenWindow("Blue Background", 800, 600);
//Use Clear Screen to change the background color to blueClearScreen(ColorBlue());
RefreshScreen(60);Delay(4000);CloseAllWindows();using SplashKitSDK;
namespace ClearScreenExample{ public class Program { public static void Main() { SplashKit.OpenWindow("Blue Background", 800, 600);
//Use Clear Screen to change the background color to blue SplashKit.ClearScreen(Color.Blue);
SplashKit.RefreshScreen(60); SplashKit.Delay(4000); SplashKit.CloseAllWindows(); } }}from splashkit import *
open_window("Blue Background", 800, 600)
# Use Clear Screen to change the background color to blueclear_screen(color_blue())
refresh_screen()delay(4000)close_all_windows()Output:
Refresh Screen
House Drawing
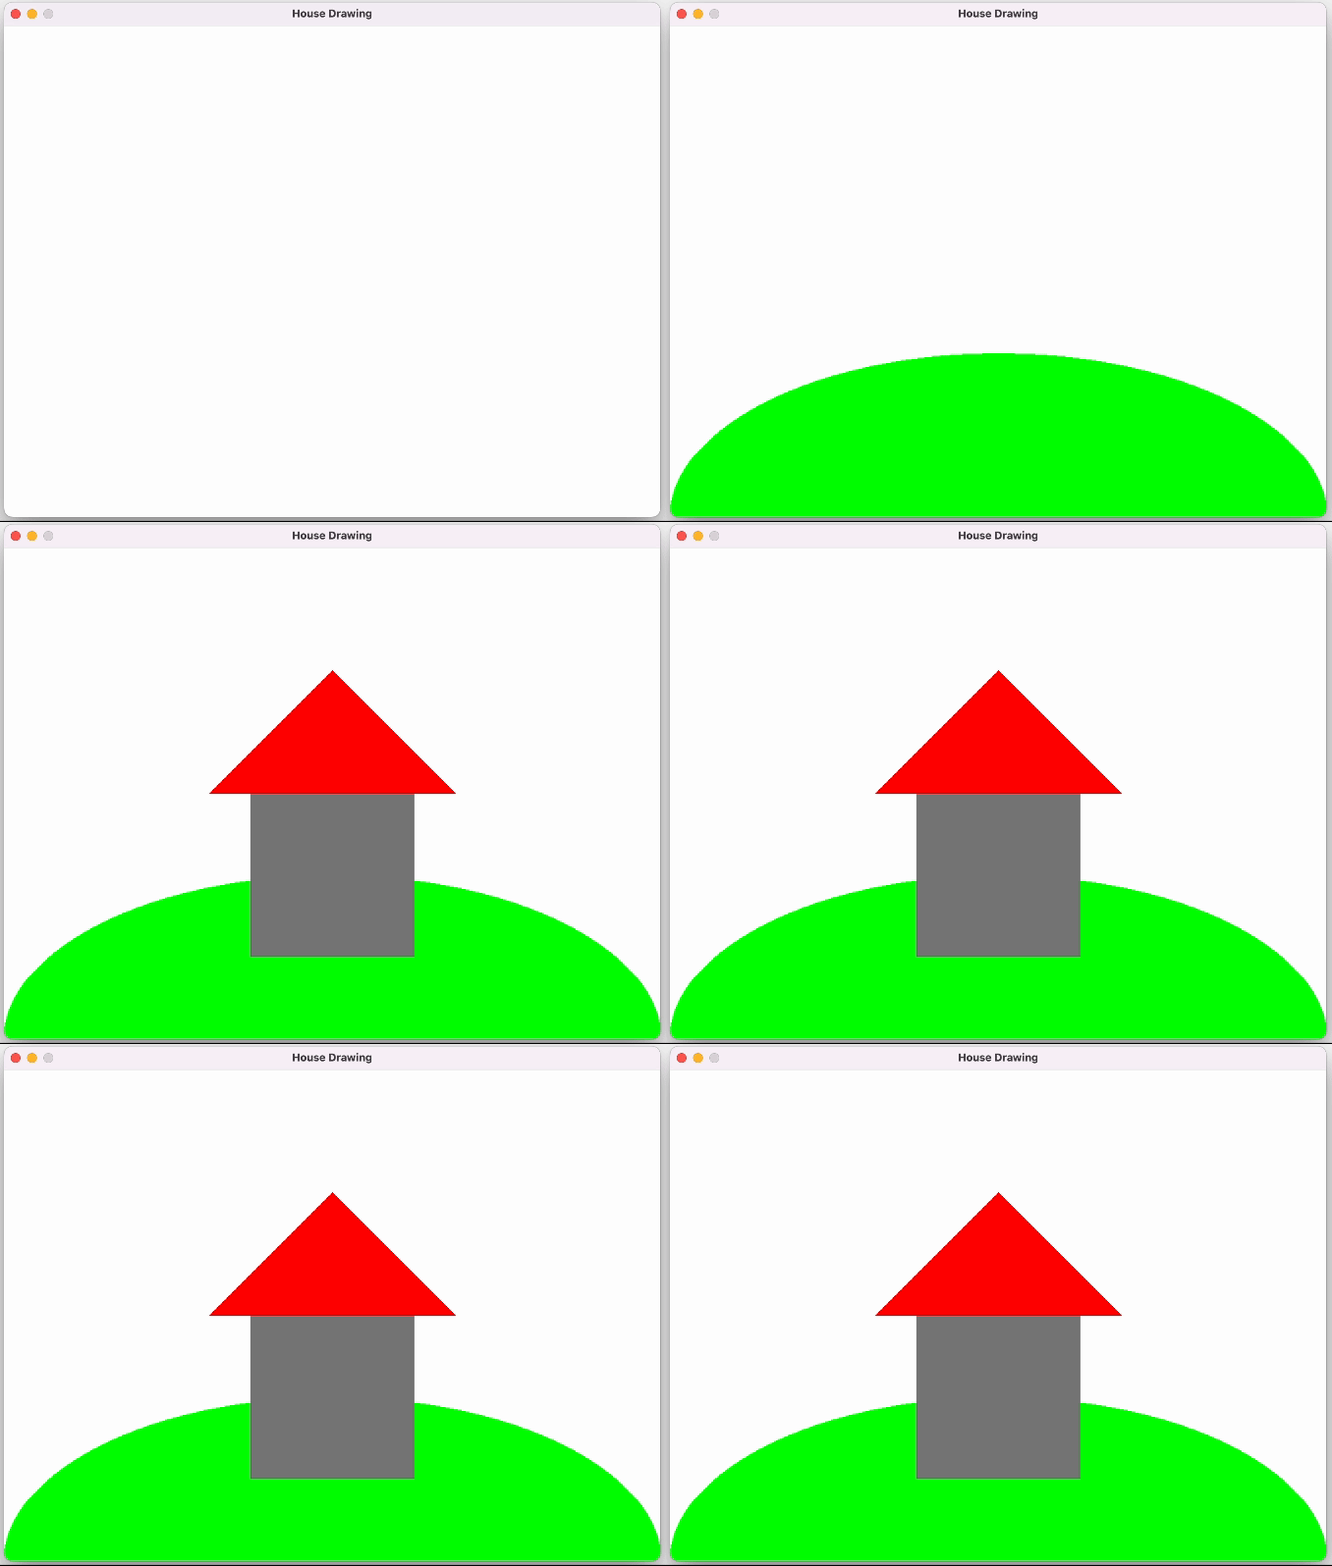
The following code shows examples of using Refresh Screen to show how double buffering works.
#include "splashkit.h"
int main(){    open_window("House Drawing", 800, 600);
    clear_screen(COLOR_WHITE);    refresh_screen();    delay(1000);
    fill_ellipse(COLOR_BRIGHT_GREEN, 0, 400, 800, 400);    refresh_screen();    delay(1000);
    fill_rectangle(COLOR_GRAY, 300, 300, 200, 200);    refresh_screen();    delay(1000);
    fill_triangle(COLOR_RED, 250, 300, 400, 150, 550, 300);    refresh_screen();    delay(5000);
    close_all_windows();
return 0;}using static SplashKitSDK.SplashKit;
OpenWindow("House Drawing", 800, 600);
ClearScreen(ColorWhite());RefreshScreen();Delay(1000);
FillEllipse(ColorBrightGreen(), 0, 400, 800, 400);RefreshScreen();Delay(1000);
FillRectangle(ColorGray(), 300, 300, 200, 200);RefreshScreen();Delay(1000);
FillTriangle(ColorRed(), 250, 300, 400, 150, 550, 300);RefreshScreen();Delay(5000);
CloseAllWindows();using SplashKitSDK;
namespace RefreshScreen{ public class Program { public static void Main() { SplashKit.OpenWindow("House Drawing", 800, 600);
SplashKit.ClearScreen(Color.White); SplashKit.RefreshScreen(); SplashKit.Delay(1000);
SplashKit.FillEllipse(Color.BrightGreen, 0, 400, 800, 400); SplashKit.RefreshScreen(); SplashKit.Delay(1000);
SplashKit.FillRectangle(Color.Gray, 300, 300, 200, 200); SplashKit.RefreshScreen(); SplashKit.Delay(1000);
SplashKit.FillTriangle(Color.Red, 250, 300, 400, 150, 550, 300); SplashKit.RefreshScreen(); SplashKit.Delay(5000);
SplashKit.CloseAllWindows(); } }}from splashkit import *
open_window("House Drawing", 800, 600)
clear_screen(color_white())refresh_screen()delay(1000)
fill_ellipse(color_bright_green(), 0, 400, 800, 400)refresh_screen()delay(1000)
fill_rectangle(color_gray(), 300, 300, 200, 200)refresh_screen()delay(1000)
fill_triangle(color_red(), 250, 300, 400, 150, 550, 300)refresh_screen()delay(5000)
close_all_windows()Output:
Draw Bitmap Named
Basic Bitmap Drawing
The following code shows an example of using Draw Bitmap to display a Bitmap image of the SplashKit logo in a graphics Window.
#include "splashkit.h"
int main(){    // Open Window    open_window("Basic Bitmap Drawing", 315, 330);
    // Load bitmap image    load_bitmap("skbox", "skbox.png");
    while (!quit_requested())    {        process_events();
        clear_screen(rgb_color(67, 80, 175));        draw_bitmap("skbox", 50, 50); // draw bitmap image        refresh_screen();    }    close_all_windows();    free_all_bitmaps();
    return 0;}
See the Graphics or Audio Beyond SplashKit guides for help compiling without SplashKit.
#include <iostream>#ifdef __APPLE__#include <SDL.h>#include <SDL_image.h>#else#include <SDL2/SDL.h>#include <SDL2/SDL_image.h>#endif
SDL_Window *sdl_open_window(const char *window_title, const int width, const int height){    // Declare Variables    SDL_Window *window = nullptr;
    // Check for successful initialisation    if (SDL_Init(SDL_INIT_VIDEO) < 0)    {        std::cout << "SDL could not be initialized: " << SDL_GetError();        exit(1);    }
    // Create Window    window = SDL_CreateWindow(        window_title,        SDL_WINDOWPOS_CENTERED,        SDL_WINDOWPOS_CENTERED,        width,        height,        SDL_WINDOW_OPENGL);
    // Error handling for window    if (window == NULL)    {        SDL_LogError(SDL_LOG_CATEGORY_ERROR, "Could not create window: %s\n", SDL_GetError());        exit(1);    }
    return window;}
SDL_Renderer *sdl_create_renderer(SDL_Window *window){    SDL_Renderer *renderer = SDL_CreateRenderer(window, -1, SDL_RENDERER_ACCELERATED);    if (renderer == NULL)    {        SDL_LogError(SDL_LOG_CATEGORY_ERROR, "Could not create rederer: %s\n", SDL_GetError());        exit(1);    }    return renderer;}
int main(int argv, char **args){    // Open Window    SDL_Window *window = sdl_open_window("Basic Bitmap Drawing", 315, 330);    SDL_Renderer *renderer = sdl_create_renderer(window);
    // Load bitmap image    // Create a surface for imported image    SDL_Surface *image = IMG_Load("Resources/images/skbox.png");    if (image == NULL)    {        std::cout << "Failed to load skbox.png" << SDL_GetError();        exit(1);    }
    // Convert surface to texture    SDL_Texture *image_texture = SDL_CreateTextureFromSurface(renderer, image);    if (image_texture == NULL)    {        std::cout << "Failed to create texture" << SDL_GetError();        exit(1);    }
    // Free memory    SDL_FreeSurface(image);
    // Get image size to avoid stretching    int background_width = 0, background_height = 0;    SDL_QueryTexture(image_texture, NULL, NULL, &background_width, &background_height);
    // Hang window until quit    SDL_Event event;    while (event.type != SDL_QUIT)    {        SDL_PollEvent(&event);
        // Clear screen with blue        SDL_SetRenderDrawColor(renderer, 67, 80, 175, 255);        SDL_RenderClear(renderer);
        // Draw image to screen        SDL_Rect image_rect = { 50, 50, background_width, background_height };        SDL_RenderCopy(renderer, image_texture, NULL, &image_rect);
        // Display drawing        SDL_RenderPresent(renderer);    }
    // Cleanup and free memory    SDL_DestroyWindow(window);    SDL_DestroyRenderer(renderer);
return 0;}using static SplashKitSDK.SplashKit;
// Open WindowOpenWindow("Basic Bitmap Drawing", 315, 330);
// Load bitmap imageLoadBitmap("skbox", "skbox.png");
while (!QuitRequested()){ ProcessEvents();
ClearScreen(RGBColor(67, 80, 175)); DrawBitmap("skbox", 50, 50); // draw bitmap image RefreshScreen();}CloseAllWindows();using SplashKitSDK;
namespace DrawBitmapNamed{ public class Program { public static void Main() { // Open Window Window window = new Window("Basic Bitmap Drawing", 315, 330);
// Load bitmap image SplashKit.LoadBitmap("skbox", "skbox.png");
while (!window.CloseRequested) { SplashKit.ProcessEvents();
SplashKit.ClearScreen(Color.RGBColor(67, 80, 175)); SplashKit.DrawBitmap("skbox", 50, 50); // draw bitmap image SplashKit.RefreshScreen(); } SplashKit.CloseAllWindows(); } }}from splashkit import *
# Open Windowopen_window("Basic Bitmap Drawing", 315, 330)
# Load bitmap imageload_bitmap("skbox", "skbox.png")
while (not quit_requested()): process_events()
clear_screen(rgb_color(67, 80, 175)) draw_bitmap_named("skbox", 50, 50); # draw bitmap image refresh_screen()close_all_windows()Output:

Hello World! This is SplashKit!
The following code shows a fun example of using Draw Bitmap to create a fun animation/video. This example was created by someone that grew up as a “horse girl” and is reminded of the Saddle Club intro theme song (played in this example) every time she creates a new “hello world” program.
Originally created for the programmers.guide website.
#include "splashkit.h"
int main(){    // Download resources    download_sound_effect("Hello World", "https://programmers.guide/resources/code-examples/part-0/hello-world-snippet-saddle-club.ogg", 443);    download_font("main", "https://programmers.guide/resources/code-examples/part-0/Roboto-Italic.ttf", 443);    download_bitmap("Earth", "https://programmers.guide/resources/code-examples/part-0/earth.png", 443);    download_bitmap("SmallEarth", "https://programmers.guide/resources/code-examples/part-0/earth-small.png", 443);    download_bitmap("SplashKitBox", "https://programmers.guide/resources/code-examples/part-0/skbox.png", 443);
    open_window("Hello World: Using Resources with SplashKit", 800, 600);    play_sound_effect("Hello World");
    clear_screen(COLOR_WHITE);    draw_text("Anyone remember the \"Hello World\" Saddle Club song?", COLOR_BLACK, "main", 30, 40, 200);    refresh_screen();    delay(2500);
    clear_screen(COLOR_WHITE);
    // H    draw_bitmap("SmallEarth", 20, 100);    draw_bitmap("SmallEarth", 20, 130);    draw_bitmap("SmallEarth", 20, 160);    draw_bitmap("SmallEarth", 20, 190);    draw_bitmap("SmallEarth", 20, 220);    draw_bitmap("SmallEarth", 52, 160);    draw_bitmap("SmallEarth", 84, 100);    draw_bitmap("SmallEarth", 84, 130);    draw_bitmap("SmallEarth", 84, 160);    draw_bitmap("SmallEarth", 84, 190);    draw_bitmap("SmallEarth", 84, 220);    refresh_screen();    delay(200);
    // E    draw_bitmap("SmallEarth", 148, 100);    draw_bitmap("SmallEarth", 148, 130);    draw_bitmap("SmallEarth", 148, 160);    draw_bitmap("SmallEarth", 148, 190);    draw_bitmap("SmallEarth", 148, 220);    draw_bitmap("SmallEarth", 180, 100);    draw_bitmap("SmallEarth", 212, 100);    draw_bitmap("SmallEarth", 180, 160);    draw_bitmap("SmallEarth", 180, 220);    draw_bitmap("SmallEarth", 212, 220);    refresh_screen();    delay(200);
    // L    draw_bitmap("SmallEarth", 276, 100);    draw_bitmap("SmallEarth", 276, 130);    draw_bitmap("SmallEarth", 276, 160);    draw_bitmap("SmallEarth", 276, 190);    draw_bitmap("SmallEarth", 276, 220);    draw_bitmap("SmallEarth", 308, 220);    draw_bitmap("SmallEarth", 340, 220);    refresh_screen();    delay(200);
    // L    draw_bitmap("SmallEarth", 404, 100);    draw_bitmap("SmallEarth", 404, 130);    draw_bitmap("SmallEarth", 404, 160);    draw_bitmap("SmallEarth", 404, 190);    draw_bitmap("SmallEarth", 404, 220);    draw_bitmap("SmallEarth", 436, 220);    draw_bitmap("SmallEarth", 468, 220);    refresh_screen();    delay(200);
    // O    draw_bitmap("SmallEarth", 530, 160);    draw_bitmap("SmallEarth", 622, 160);    draw_bitmap("SmallEarth", 540, 128);    draw_bitmap("SmallEarth", 560, 100);    draw_bitmap("SmallEarth", 592, 100);    draw_bitmap("SmallEarth", 612, 128);    draw_bitmap("SmallEarth", 540, 192);    draw_bitmap("SmallEarth", 560, 220);    draw_bitmap("SmallEarth", 592, 220);    draw_bitmap("SmallEarth", 612, 192);    refresh_screen();    delay(500);
    // World    draw_bitmap("Earth", 100, 350);    refresh_screen();    delay(2000);
    // SplashKit ("Me")    draw_bitmap("SplashKitBox", 450, 300);    draw_text("SplashKit!", COLOR_BLACK, "main", 50, 450, 530);    refresh_screen();    delay(2000);
    close_all_windows();
return 0;}using static SplashKitSDK.SplashKit;
// Download resourcesDownloadSoundEffect("Hello World", "https://programmers.guide/resources/code-examples/part-0/hello-world-snippet-saddle-club.ogg", 443);DownloadFont("main", "https://programmers.guide/resources/code-examples/part-0/Roboto-Italic.ttf", 443);DownloadBitmap("Earth", "https://programmers.guide/resources/code-examples/part-0/earth.png", 443);DownloadBitmap("SmallEarth", "https://programmers.guide/resources/code-examples/part-0/earth-small.png", 443);DownloadBitmap("SplashKitBox", "https://programmers.guide/resources/code-examples/part-0/skbox.png", 443);
OpenWindow("Hello World: Using Resources with SplashKit", 800, 600);PlaySoundEffect("Hello World");
ClearScreen(ColorWhite());DrawText("Anyone remember the \"Hello World\" Saddle Club song?", ColorBlack(), "main", 30, 40, 200);RefreshScreen();Delay(2500);
ClearScreen(ColorWhite());
// HDrawBitmap("SmallEarth", 20, 100);DrawBitmap("SmallEarth", 20, 130);DrawBitmap("SmallEarth", 20, 160);DrawBitmap("SmallEarth", 20, 190);DrawBitmap("SmallEarth", 20, 220);DrawBitmap("SmallEarth", 52, 160);DrawBitmap("SmallEarth", 84, 100);DrawBitmap("SmallEarth", 84, 130);DrawBitmap("SmallEarth", 84, 160);DrawBitmap("SmallEarth", 84, 190);DrawBitmap("SmallEarth", 84, 220);RefreshScreen();Delay(200);
// EDrawBitmap("SmallEarth", 148, 100);DrawBitmap("SmallEarth", 148, 130);DrawBitmap("SmallEarth", 148, 160);DrawBitmap("SmallEarth", 148, 190);DrawBitmap("SmallEarth", 148, 220);DrawBitmap("SmallEarth", 180, 100);DrawBitmap("SmallEarth", 212, 100);DrawBitmap("SmallEarth", 180, 160);DrawBitmap("SmallEarth", 180, 220);DrawBitmap("SmallEarth", 212, 220);RefreshScreen();Delay(200);
// LDrawBitmap("SmallEarth", 276, 100);DrawBitmap("SmallEarth", 276, 130);DrawBitmap("SmallEarth", 276, 160);DrawBitmap("SmallEarth", 276, 190);DrawBitmap("SmallEarth", 276, 220);DrawBitmap("SmallEarth", 308, 220);DrawBitmap("SmallEarth", 340, 220);RefreshScreen();Delay(200);
// LDrawBitmap("SmallEarth", 404, 100);DrawBitmap("SmallEarth", 404, 130);DrawBitmap("SmallEarth", 404, 160);DrawBitmap("SmallEarth", 404, 190);DrawBitmap("SmallEarth", 404, 220);DrawBitmap("SmallEarth", 436, 220);DrawBitmap("SmallEarth", 468, 220);RefreshScreen();Delay(200);
// ODrawBitmap("SmallEarth", 530, 160);DrawBitmap("SmallEarth", 622, 160);DrawBitmap("SmallEarth", 540, 128);DrawBitmap("SmallEarth", 560, 100);DrawBitmap("SmallEarth", 592, 100);DrawBitmap("SmallEarth", 612, 128);DrawBitmap("SmallEarth", 540, 192);DrawBitmap("SmallEarth", 560, 220);DrawBitmap("SmallEarth", 592, 220);DrawBitmap("SmallEarth", 612, 192);RefreshScreen();Delay(500);
// WorldDrawBitmap("Earth", 100, 350);RefreshScreen();Delay(2000);
// SplashKit ("Me")DrawBitmap("SplashKitBox", 450, 300);DrawText("SplashKit!", ColorBlack(), "main", 50, 450, 530);RefreshScreen();Delay(2000);using SplashKitSDK;
namespace GUIHelloWorld{ public class Program { public static void Main() { // Download resources SplashKit.DownloadSoundEffect("Hello World", "https://programmers.guide/resources/code-examples/part-0/hello-world-snippet-saddle-club.ogg", 443); SplashKit.DownloadFont("main", "https://programmers.guide/resources/code-examples/part-0/Roboto-Italic.ttf", 443); SplashKit.DownloadBitmap("Earth", "https://programmers.guide/resources/code-examples/part-0/earth.png", 443); SplashKit.DownloadBitmap("SmallEarth", "https://programmers.guide/resources/code-examples/part-0/earth-small.png", 443); SplashKit.DownloadBitmap("SplashKitBox", "https://programmers.guide/resources/code-examples/part-0/skbox.png", 443);
SplashKit.OpenWindow("Hello World: Using Resources with SplashKit", 800, 600); SplashKit.PlaySoundEffect("Hello World");
SplashKit.ClearScreen(Color.White); SplashKit.DrawText("Anyone remember the \"Hello World\" Saddle Club song?", Color.Black, "main", 30, 40, 200); SplashKit.RefreshScreen(); SplashKit.Delay(2500);
SplashKit.ClearScreen(Color.White);
// H SplashKit.DrawBitmap("SmallEarth", 20, 100); SplashKit.DrawBitmap("SmallEarth", 20, 130); SplashKit.DrawBitmap("SmallEarth", 20, 160); SplashKit.DrawBitmap("SmallEarth", 20, 190); SplashKit.DrawBitmap("SmallEarth", 20, 220); SplashKit.DrawBitmap("SmallEarth", 52, 160); SplashKit.DrawBitmap("SmallEarth", 84, 100); SplashKit.DrawBitmap("SmallEarth", 84, 130); SplashKit.DrawBitmap("SmallEarth", 84, 160); SplashKit.DrawBitmap("SmallEarth", 84, 190); SplashKit.DrawBitmap("SmallEarth", 84, 220); SplashKit.RefreshScreen(); SplashKit.Delay(200);
// E SplashKit.DrawBitmap("SmallEarth", 148, 100); SplashKit.DrawBitmap("SmallEarth", 148, 130); SplashKit.DrawBitmap("SmallEarth", 148, 160); SplashKit.DrawBitmap("SmallEarth", 148, 190); SplashKit.DrawBitmap("SmallEarth", 148, 220); SplashKit.DrawBitmap("SmallEarth", 180, 100); SplashKit.DrawBitmap("SmallEarth", 212, 100); SplashKit.DrawBitmap("SmallEarth", 180, 160); SplashKit.DrawBitmap("SmallEarth", 180, 220); SplashKit.DrawBitmap("SmallEarth", 212, 220); SplashKit.RefreshScreen(); SplashKit.Delay(200);
// L SplashKit.DrawBitmap("SmallEarth", 276, 100); SplashKit.DrawBitmap("SmallEarth", 276, 130); SplashKit.DrawBitmap("SmallEarth", 276, 160); SplashKit.DrawBitmap("SmallEarth", 276, 190); SplashKit.DrawBitmap("SmallEarth", 276, 220); SplashKit.DrawBitmap("SmallEarth", 308, 220); SplashKit.DrawBitmap("SmallEarth", 340, 220); SplashKit.RefreshScreen(); SplashKit.Delay(200);
// L SplashKit.DrawBitmap("SmallEarth", 404, 100); SplashKit.DrawBitmap("SmallEarth", 404, 130); SplashKit.DrawBitmap("SmallEarth", 404, 160); SplashKit.DrawBitmap("SmallEarth", 404, 190); SplashKit.DrawBitmap("SmallEarth", 404, 220); SplashKit.DrawBitmap("SmallEarth", 436, 220); SplashKit.DrawBitmap("SmallEarth", 468, 220); SplashKit.RefreshScreen(); SplashKit.Delay(200);
// O SplashKit.DrawBitmap("SmallEarth", 530, 160); SplashKit.DrawBitmap("SmallEarth", 622, 160); SplashKit.DrawBitmap("SmallEarth", 540, 128); SplashKit.DrawBitmap("SmallEarth", 560, 100); SplashKit.DrawBitmap("SmallEarth", 592, 100); SplashKit.DrawBitmap("SmallEarth", 612, 128); SplashKit.DrawBitmap("SmallEarth", 540, 192); SplashKit.DrawBitmap("SmallEarth", 560, 220); SplashKit.DrawBitmap("SmallEarth", 592, 220); SplashKit.DrawBitmap("SmallEarth", 612, 192); SplashKit.RefreshScreen(); SplashKit.Delay(500);
// World SplashKit.DrawBitmap("Earth", 100, 350); SplashKit.RefreshScreen(); SplashKit.Delay(2000);
// SplashKit ("Me") SplashKit.DrawBitmap("SplashKitBox", 450, 300); SplashKit.DrawText("SplashKit!", Color.Black, "main", 50, 450, 530); SplashKit.RefreshScreen(); SplashKit.Delay(2000);
SplashKit.CloseAllWindows(); } }}from splashkit import *
# Download resourcesdownload_sound_effect("Hello World", "https://programmers.guide/resources/code-examples/part-0/hello-world-snippet-saddle-club.ogg", 443)download_font("main", "https://programmers.guide/resources/code-examples/part-0/Roboto-Italic.ttf", 443)download_bitmap("Earth", "https://programmers.guide/resources/code-examples/part-0/earth.png", 443)download_bitmap("SmallEarth", "https://programmers.guide/resources/code-examples/part-0/earth-small.png", 443)download_bitmap("SplashKitBox", "https://programmers.guide/resources/code-examples/part-0/skbox.png", 443)
open_window("Hello World: Using Resources with SplashKit", 800, 600)play_sound_effect_named("Hello World")
clear_screen(color_white())draw_text_font_as_string("Anyone remember the \"Hello World\" Saddle Club song?", color_black(), "main", 30, 40, 200)refresh_screen()delay(2500)
clear_screen(color_white())
# Hdraw_bitmap_named("SmallEarth", 20, 100)draw_bitmap_named("SmallEarth", 20, 130)draw_bitmap_named("SmallEarth", 20, 160)draw_bitmap_named("SmallEarth", 20, 190)draw_bitmap_named("SmallEarth", 20, 220)draw_bitmap_named("SmallEarth", 52, 160)draw_bitmap_named("SmallEarth", 84, 100)draw_bitmap_named("SmallEarth", 84, 130)draw_bitmap_named("SmallEarth", 84, 160)draw_bitmap_named("SmallEarth", 84, 190)draw_bitmap_named("SmallEarth", 84, 220)refresh_screen()delay(200)
# Edraw_bitmap_named("SmallEarth", 148, 100)draw_bitmap_named("SmallEarth", 148, 130)draw_bitmap_named("SmallEarth", 148, 160)draw_bitmap_named("SmallEarth", 148, 190)draw_bitmap_named("SmallEarth", 148, 220)draw_bitmap_named("SmallEarth", 180, 100)draw_bitmap_named("SmallEarth", 212, 100)draw_bitmap_named("SmallEarth", 180, 160)draw_bitmap_named("SmallEarth", 180, 220)draw_bitmap_named("SmallEarth", 212, 220)refresh_screen()delay(200)
# Ldraw_bitmap_named("SmallEarth", 276, 100)draw_bitmap_named("SmallEarth", 276, 130)draw_bitmap_named("SmallEarth", 276, 160)draw_bitmap_named("SmallEarth", 276, 190)draw_bitmap_named("SmallEarth", 276, 220)draw_bitmap_named("SmallEarth", 308, 220)draw_bitmap_named("SmallEarth", 340, 220)refresh_screen()delay(200)
# Ldraw_bitmap_named("SmallEarth", 404, 100)draw_bitmap_named("SmallEarth", 404, 130)draw_bitmap_named("SmallEarth", 404, 160)draw_bitmap_named("SmallEarth", 404, 190)draw_bitmap_named("SmallEarth", 404, 220)draw_bitmap_named("SmallEarth", 436, 220)draw_bitmap_named("SmallEarth", 468, 220)refresh_screen()delay(200)
# Odraw_bitmap_named("SmallEarth", 530, 160)draw_bitmap_named("SmallEarth", 622, 160)draw_bitmap_named("SmallEarth", 540, 128)draw_bitmap_named("SmallEarth", 560, 100)draw_bitmap_named("SmallEarth", 592, 100)draw_bitmap_named("SmallEarth", 612, 128)draw_bitmap_named("SmallEarth", 540, 192)draw_bitmap_named("SmallEarth", 560, 220)draw_bitmap_named("SmallEarth", 592, 220)draw_bitmap_named("SmallEarth", 612, 192)refresh_screen()delay(500)
# Worlddraw_bitmap_named("Earth", 100, 350)refresh_screen()delay(2000)
# SplashKit ("Me")draw_bitmap_named("SplashKitBox", 450, 300)draw_text_font_as_string("SplashKit!", color_black(), "main", 50, 450, 530)refresh_screen()delay(2000)
close_all_windows()Output:
Draw Line
Colourful Starburst
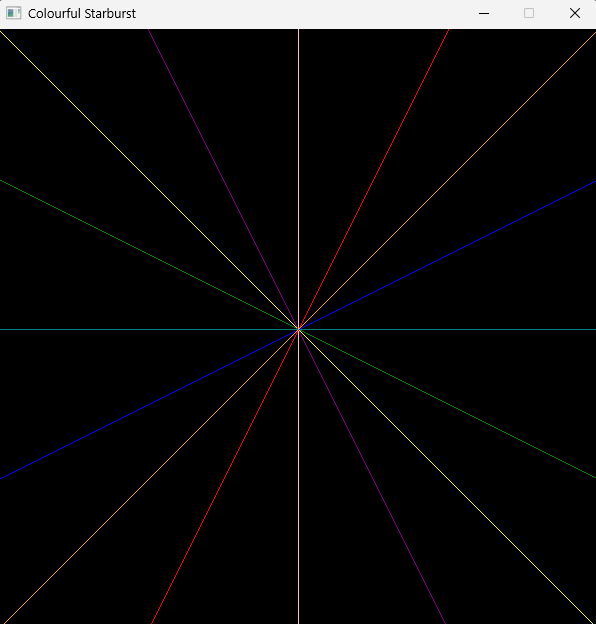
The following code shows examples of using Draw Line to draw a colourful starburst pattern on the screen.
#include "splashkit.h"
int main(){    open_window("Colourful Starburst", 600, 600);    clear_screen(COLOR_BLACK);
    // Draws starburst pattern with changing colours to window    draw_line(COLOR_YELLOW, 0, 0, 600, 600);    draw_line(COLOR_GREEN, 0, 150, 600, 450);    draw_line(COLOR_TEAL, 0, 300, 600, 300);    draw_line(COLOR_BLUE, 0, 450, 600, 150);    draw_line(COLOR_VIOLET, 0, 600, 600, 0);    draw_line(COLOR_PURPLE, 150, 0, 450, 600);    draw_line(COLOR_PINK, 300, 0, 300, 600);    draw_line(COLOR_RED, 450, 0, 150, 600);    draw_line(COLOR_ORANGE, 600, 0, 0, 600);
refresh_screen(); delay(5000); close_all_windows(); return 0;}using static SplashKitSDK.SplashKit;
OpenWindow("Colourful Starburst", 600, 600);ClearScreen(ColorBlack());
// Draws starburst pattern with changing coloursDrawLine(ColorYellow(), 0, 0, 600, 600);DrawLine(ColorGreen(), 0, 150, 600, 450);DrawLine(ColorTeal(), 0, 300, 600, 300);DrawLine(ColorBlue(), 0, 450, 600, 150);DrawLine(ColorViolet(), 0, 600, 600, 0);DrawLine(ColorPurple(), 150, 0, 450, 600);DrawLine(ColorPink(), 300, 0, 300, 600);DrawLine(ColorRed(), 450, 0, 150, 600);DrawLine(ColorOrange(), 600, 0, 0, 600);
RefreshScreen();Delay(5000);CloseAllWindows();using SplashKitSDK;
namespace DrawLineExample{ public class Program { public static void Main() { Window window = new Window("Colourful Starburst", 600, 600); window.Clear(Color.Black);
// Draws starburst pattern with changing colours to window window.DrawLine(Color.Yellow, 0, 0, 600, 600); window.DrawLine(Color.Green, 0, 150, 600, 450); window.DrawLine(Color.Teal, 0, 300, 600, 300); window.DrawLine(Color.Blue, 0, 450, 600, 150); window.DrawLine(Color.Violet, 0, 600, 600, 0); window.DrawLine(Color.Purple, 150, 0, 450, 600); window.DrawLine(Color.Pink, 300, 0, 300, 600); window.DrawLine(Color.Red, 450, 0, 150, 600); window.DrawLine(Color.Orange, 600, 0, 0, 600);
window.Refresh(); SplashKit.Delay(5000); window.Close(); } }}from splashkit import *
open_window("Colourful Starburst", 600, 600)clear_screen(color_black())
# Draws starburst pattern with changing colours to windowdraw_line(color_yellow(), 0, 0, 600, 600)draw_line(color_green(), 0, 150, 600, 450)draw_line(color_teal(), 0, 300, 600, 300)draw_line(color_blue(), 0, 450, 600, 150)draw_line(color_violet(), 0, 600, 600, 0)draw_line(color_purple(), 150, 0, 450, 600)draw_line(color_pink(), 300, 0, 300, 600)draw_line(color_red(), 450, 0, 150, 600)draw_line(color_orange(), 600, 0, 0, 600)
refresh_screen()delay(5000)close_all_windows()Output:
Draw Line On Bitmap
Drawing a Route on a Map
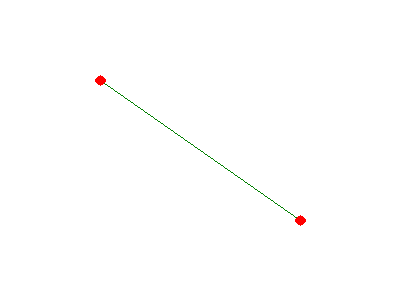
The following code demonstrates how to use Draw Line On Bitmap to create a simple route between two points on a map.
#include "splashkit.h"
int main(){    // Create a Window and bitmap for the map    window window = open_window("Window", 400, 300);    bitmap bitmap = create_bitmap("map", 400, 300);
    // Fill background with white    clear_bitmap(bitmap, COLOR_WHITE);
    // Draw the route line and points    draw_line_on_bitmap(bitmap, COLOR_GREEN,                       100, 80,    // Starting point (x1, y1)                       300, 220);  // End point (x2, y2)    fill_circle_on_bitmap(bitmap, COLOR_RED, 100, 80, 5);    // Start point    fill_circle_on_bitmap(bitmap, COLOR_RED, 300, 220, 5);   // End point
    while (!window_close_requested(window))    {        process_events();        // Draw the bitmap to the current window        draw_bitmap(bitmap, 0, 0);        refresh_screen();    }
free_bitmap(bitmap); close_all_windows(); return 0;}using SplashKitSDK;using static SplashKitSDK.SplashKit;
// Create a Window and bitmap for the mapWindow window = OpenWindow("Window", 400, 300);Bitmap bitmap = CreateBitmap("map", 400, 300);
// Fill background with whiteClearBitmap(bitmap, ColorWhite());
// Draw the route line and pointsDrawLineOnBitmap(bitmap, ColorGreen(), 100, 80, // Starting point (x1, y1) 300, 220); // End point (x2, y2)FillCircleOnBitmap(bitmap, ColorRed(), 100, 80, 5); // Start pointFillCircleOnBitmap(bitmap, ColorRed(), 300, 220, 5); // End point
while (!window.CloseRequested){ ProcessEvents(); // Draw the bitmap to the current window DrawBitmap(bitmap, 0, 0); RefreshScreen();}
FreeBitmap(bitmap);CloseAllWindows();using SplashKitSDK;
namespace DrawLineOnBitmap{ public class Program { public static void Main() { // Create a Window and bitmap for the map Window window = new Window("Window", 400, 300); Bitmap bitmap = new Bitmap("map", 400, 300);
// Fill background with white SplashKit.ClearBitmap(bitmap, Color.White);
// Draw the route line and points SplashKit.DrawLineOnBitmap(bitmap, Color.Green, 100, 80, // Starting point (x1, y1) 300, 220); // End point (x2, y2) SplashKit.FillCircleOnBitmap(bitmap, Color.Red, 100, 80, 5); // Start point SplashKit.FillCircleOnBitmap(bitmap, Color.Red, 300, 220, 5); // End point
while (!window.CloseRequested) { SplashKit.ProcessEvents(); // Draw the bitmap to the current window window.DrawBitmap(bitmap, 0, 0); SplashKit.RefreshScreen(); } bitmap.Free(); window.Cl } }}from splashkit import *
# Create a Window and bitmap for the mapwindow = open_window("Window", 400, 300)bitmap = create_bitmap("map", 400, 300)
# Fill background with whiteclear_bitmap(bitmap, color_white())
# Draw the route line and pointsdraw_line_on_bitmap(bitmap, color_green(), 100, 80, # Starting point (x1, y1) 300, 220) # End point (x2, y2)fill_circle_on_bitmap(bitmap, color_red(), 100, 80, 5) # Start pointfill_circle_on_bitmap(bitmap, color_red(), 300, 220, 5) # End point
while not window_close_requested(window): process_events() # Draw the bitmap to the current window draw_bitmap(bitmap, 0, 0) refresh_screen()
free_bitmap(bitmap)close_all_windows()Output:
Draw Line On Window
Basic Line Drawing
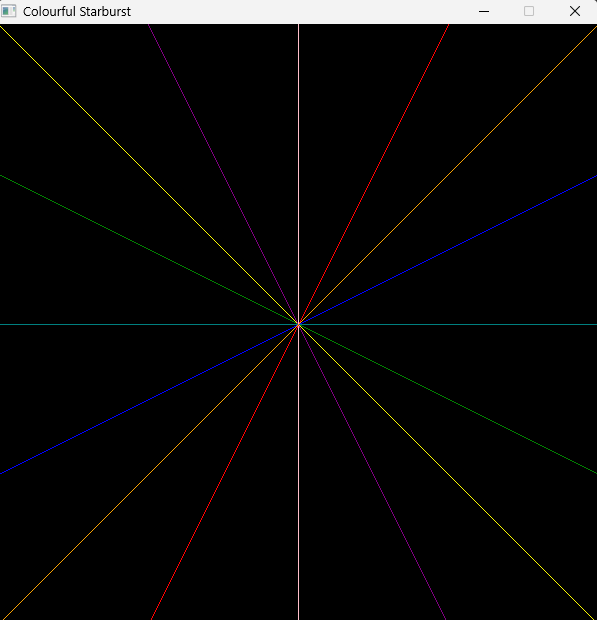
The following code shows examples of using Draw Line On Window to draw a colourful starburst pattern on a specific window.
#include "splashkit.h"
int main(){    // Create Window    window window = open_window("Colourful Starburst", 600, 600);
    clear_screen(COLOR_BLACK);
    // Draws starburst pattern with changing colours to specific window    draw_line_on_window(window, COLOR_YELLOW, 0, 0, 600, 600);    draw_line_on_window(window, COLOR_GREEN, 0, 150, 600, 450);    draw_line_on_window(window, COLOR_TEAL, 0, 300, 600, 300);    draw_line_on_window(window, COLOR_BLUE, 0, 450, 600, 150);    draw_line_on_window(window, COLOR_VIOLET, 0, 600, 600, 0);    draw_line_on_window(window, COLOR_PURPLE, 150, 0, 450, 600);    draw_line_on_window(window, COLOR_PINK, 300, 0, 300, 600);    draw_line_on_window(window, COLOR_RED, 450, 0, 150, 600);    draw_line_on_window(window, COLOR_ORANGE, 600, 0, 0, 600);
    refresh_screen();
    delay(5000);    close_all_windows();
return 0;}using SplashKitSDK;using static SplashKitSDK.SplashKit;
// Create WindowWindow window = OpenWindow("Colourful Starburst", 600, 600);
ClearScreen(ColorBlack());
// Draws starburst pattern with changing colours to specific windowDrawLineOnWindow(window, ColorYellow(), 0, 0, 600, 600);DrawLineOnWindow(window, ColorGreen(), 0, 150, 600, 450);DrawLineOnWindow(window, ColorTeal(), 0, 300, 600, 300);DrawLineOnWindow(window, ColorBlue(), 0, 450, 600, 150);DrawLineOnWindow(window, ColorViolet(), 0, 600, 600, 0);DrawLineOnWindow(window, ColorPurple(), 150, 0, 450, 600);DrawLineOnWindow(window, ColorPink(), 300, 0, 300, 600);DrawLineOnWindow(window, ColorRed(), 450, 0, 150, 600);DrawLineOnWindow(window, ColorOrange(), 600, 0, 0, 600);
RefreshScreen();
Delay(5000);CloseAllWindows();using SplashKitSDK;
namespace DrawLineOnWindowExample{ public class Program { public static void Main() { // Create Window Window window = new Window("Colourful Starburst", 600, 600);
window.Clear(Color.Black);
// Draws starburst pattern with changing colours to specific window window.DrawLine(Color.Yellow, 0, 0, 600, 600); window.DrawLine(Color.Green, 0, 150, 600, 450); window.DrawLine(Color.Teal, 0, 300, 600, 300); window.DrawLine(Color.Blue, 0, 450, 600, 150); window.DrawLine(Color.Violet, 0, 600, 600, 0); window.DrawLine(Color.Purple, 150, 0, 450, 600); window.DrawLine(Color.Pink, 300, 0, 300, 600); window.DrawLine(Color.Red, 450, 0, 150, 600); window.DrawLine(Color.Orange, 600, 0, 0, 600);
window.Refresh();
SplashKit.Delay(5000); window.Close(); } }}from splashkit import *
# Create Windowwindow = open_window("Colourful Starburst", 600, 600)
clear_screen(color_black())
# Draws starburst pattern with changing colours to specific windowdraw_line_on_window(window, color_yellow(), 0, 0, 600, 600)draw_line_on_window(window, color_green(), 0, 150, 600, 450)draw_line_on_window(window, color_teal(), 0, 300, 600, 300)draw_line_on_window(window, color_blue(), 0, 450, 600, 150)draw_line_on_window(window, color_violet(), 0, 600, 600, 0)draw_line_on_window(window, color_purple(), 150, 0, 450, 600)draw_line_on_window(window, color_pink(), 300, 0, 300, 600)draw_line_on_window(window, color_red(), 450, 0, 150, 600)draw_line_on_window(window, color_orange(), 600, 0, 0, 600)
refresh_screen()
delay(5000)close_all_windows()Output:
Draw Quad
Ninja Star
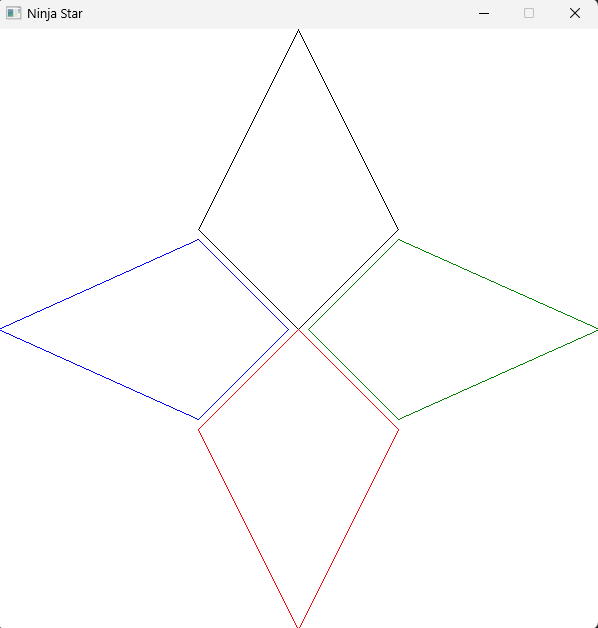
The following code shows examples of using Draw Quad to show how to draw a 4 sided shape. This example aranges for diamond style shapes into a ninja star pattern.
#include "splashkit.h"
int main(){    // Create 4 diamond shapes using quads    quad q1 = quad_from(400, 200, 300, 300, 300, 0, 200, 200);    quad q2 = quad_from(400, 210, 310, 300, 600, 300, 400, 390);    quad q3 = quad_from(200, 400, 300, 300, 300, 600, 400, 400);    quad q4 = quad_from(200, 390, 290, 300, 0, 300, 200, 210);
    open_window("Ninja Star", 600, 600);    clear_screen(COLOR_WHITE);
    // Draw the quads    draw_quad(COLOR_BLACK, q1);    draw_quad(COLOR_GREEN, q2);    draw_quad(COLOR_RED, q3);    draw_quad(COLOR_BLUE, q4);
refresh_screen(); delay(5000); close_all_windows(); return 0;}using SplashKitSDK;using static SplashKitSDK.SplashKit;
// Create 4 diamond shapes using quadsQuad q1 = QuadFrom(400, 200, 300, 300, 300, 0, 200, 200);Quad q2 = QuadFrom(400, 210, 310, 300, 600, 300, 400, 390);Quad q3 = QuadFrom(200, 400, 300, 300, 300, 600, 400, 400);Quad q4 = QuadFrom(200, 390, 290, 300, 0, 300, 200, 210);
OpenWindow("Ninja Star", 600, 600);ClearScreen(ColorWhite());
// Draw the quadsDrawQuad(ColorBlack(), q1);DrawQuad(ColorGreen(), q2);DrawQuad(ColorRed(), q3);DrawQuad(ColorBlue(), q4);
RefreshScreen();Delay(5000);CloseAllWindows();using SplashKitSDK;
namespace DrawQuadExample{ public class Program { public static void Main() { // Create 4 diamond shapes using quads Quad q1 = SplashKit.QuadFrom(400, 200, 300, 300, 300, 0, 200, 200); Quad q2 = SplashKit.QuadFrom(400, 210, 310, 300, 600, 300, 400, 390); Quad q3 = SplashKit.QuadFrom(200, 400, 300, 300, 300, 600, 400, 400); Quad q4 = SplashKit.QuadFrom(200, 390, 290, 300, 0, 300, 200, 210);
SplashKit.OpenWindow("Ninja Star", 600, 600); SplashKit.ClearScreen(Color.White);
// Draw the quads SplashKit.DrawQuad(Color.Black, q1); SplashKit.DrawQuad(Color.Green, q2); SplashKit.DrawQuad(Color.Red, q3); SplashKit.DrawQuad(Color.Blue, q4);
SplashKit.RefreshScreen(); SplashKit.Delay(5000); SplashKit.CloseAllWindows(); } }}from splashkit import *
# Create 4 diamond shapes using quadsq1 = quad_from(400, 200, 300, 300, 300, 0, 200, 200)q2 = quad_from(400, 210, 310, 300, 600, 300, 400, 390)q3 = quad_from(200, 400, 300, 300, 300, 600, 400, 400)q4 = quad_from(200, 390, 290, 300, 0, 300, 200, 210)
open_window("Ninja Star", 600, 600)clear_screen(color_white())
# Draw the quadsdraw_quad(color_black(), q1)draw_quad(color_green(), q2)draw_quad(color_red(), q3)draw_quad(color_blue(), q4)
refresh_screen()delay(5000)close_all_windows()Output:
Draw Quad On Window
Halved Ninja Star
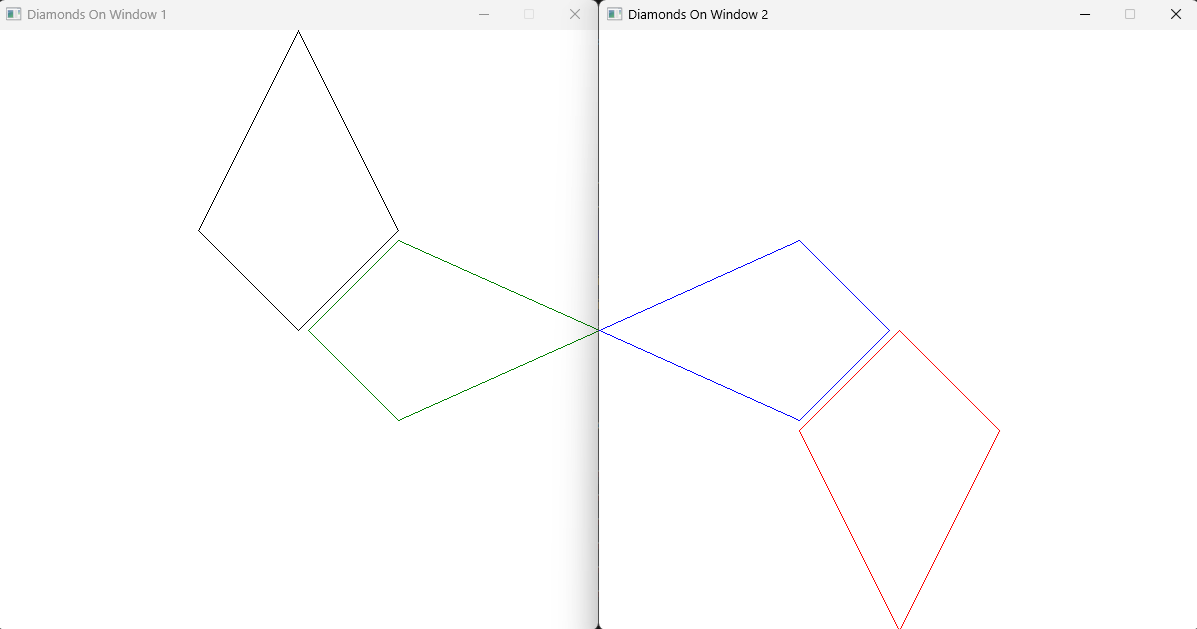
The following code shows examples of using Draw Quad On Window to show how to draw a 4 sided shape to a specific window. The example extends this Draw Quad usage example to split it across 2 separate windows.
#include "splashkit.h"
int main(){    // Create diamond shaped quads    quad q1 = quad_from(400, 200, 300, 300, 300, 0, 200, 200);    quad q2 = quad_from(400, 210, 310, 300, 600, 300, 400, 390);    quad q3 = quad_from(200, 400, 300, 300, 300, 600, 400, 400);    quad q4 = quad_from(200, 390, 290, 300, 0, 300, 200, 210);
    // Create two windows    window window_1 = open_window("Diamonds On Window 1", 600, 600);    window window_2 = open_window("Diamonds On Window 2", 600, 600);
    // Move windows to see both side by side    move_window_to(window_1, 0, 0);    move_window_to(window_2, window_width(window_1), 0);
    clear_screen(COLOR_WHITE);
    // Draw the first and second quad on first window    draw_quad_on_window(window_1, COLOR_BLACK, q1);    draw_quad_on_window(window_1, COLOR_GREEN, q2);
    // Draw the third and fourth quad on second window    draw_quad_on_window(window_2, COLOR_RED, q3);    draw_quad_on_window(window_2, COLOR_BLUE, q4);
    refresh_screen();    delay(5000);    close_all_windows();
return 0;}using SplashKitSDK;using static SplashKitSDK.SplashKit;
// Create diamond shaped quadsQuad q1 = QuadFrom(400, 200, 300, 300, 300, 0, 200, 200);Quad q2 = QuadFrom(400, 210, 310, 300, 600, 300, 400, 390);Quad q3 = QuadFrom(200, 400, 300, 300, 300, 600, 400, 400);Quad q4 = QuadFrom(200, 390, 290, 300, 0, 300, 200, 210);
// Create two WindowsWindow window1 = OpenWindow("Diamonds On Window 1", 600, 600);Window window2 = OpenWindow("Diamonds On Window 2", 600, 600);
// Move windows to see both side by sideMoveWindowTo(window1, 0, 0);MoveWindowTo(window2, WindowWidth(window1), 0);
ClearScreen(ColorWhite());
// Draw the first and second quad on first windowDrawQuadOnWindow(window1, ColorBlack(), q1);DrawQuadOnWindow(window1, ColorGreen(), q2);
// Draw the third and fourth quad on second windowDrawQuadOnWindow(window2, ColorRed(), q3);DrawQuadOnWindow(window2, ColorBlue(), q4);
RefreshScreen();Delay(5000);CloseAllWindows();using SplashKitSDK;
namespace DrawQuadOnWindowExample{ public class Program { public static void Main() { // Create diamond shaped quads Quad q1 = SplashKit.QuadFrom(400, 200, 300, 300, 300, 0, 200, 200); Quad q2 = SplashKit.QuadFrom(400, 210, 310, 300, 600, 300, 400, 390); Quad q3 = SplashKit.QuadFrom(200, 400, 300, 300, 300, 600, 400, 400); Quad q4 = SplashKit.QuadFrom(200, 390, 290, 300, 0, 300, 200, 210);
// Create two Windows Window window1 = SplashKit.OpenWindow("Diamonds On Window 1", 600, 600); Window window2 = SplashKit.OpenWindow("Diamonds On Window 2", 600, 600);
// Move windows to see both side by side window1.MoveTo(0, 0); window2.MoveTo(window1.Width, 0);
SplashKit.ClearScreen(Color.White);
// Draw the first and second quad on first window window1.DrawQuad(Color.Black, q1); window1.DrawQuad(Color.Green, q2); // Draw the third and fourth quad on second window window2.DrawQuad(Color.Red, q3); window2.DrawQuad(Color.Blue, q4);
SplashKit.RefreshScreen(); SplashKit.Delay(5000); SplashKit.CloseAllWindows(); } }}from splashkit import *
# Create diamond shaped quadsq1 = quad_from(400, 200, 300, 300, 300, 0, 200, 200)q2 = quad_from(400, 210, 310, 300, 600, 300, 400, 390)q3 = quad_from(200, 400, 300, 300, 300, 600, 400, 400)q4 = quad_from(200, 390, 290, 300, 0, 300, 200, 210)
# Create two Windowswindow_1 = open_window("Diamonds On Window 1", 600, 600)window_2 = open_window("Diamonds On Window 2", 600, 600)
# Move windows to see both side by sidemove_window_to(window_1, 0, 0)move_window_to(window_2, window_width(window_1), 0)
clear_screen(color_white())
# Draw the first and second quad on first windowdraw_quad_on_window(window_1, color_black(), q1)draw_quad_on_window(window_1, color_green(), q2)
# Draw the third and fourth quad on second windowdraw_quad_on_window(window_2, color_red(), q3)draw_quad_on_window(window_2, color_blue(), q4)
refresh_screen()delay(5000)close_all_windows()Output:
Fill Quad
Coloured Star
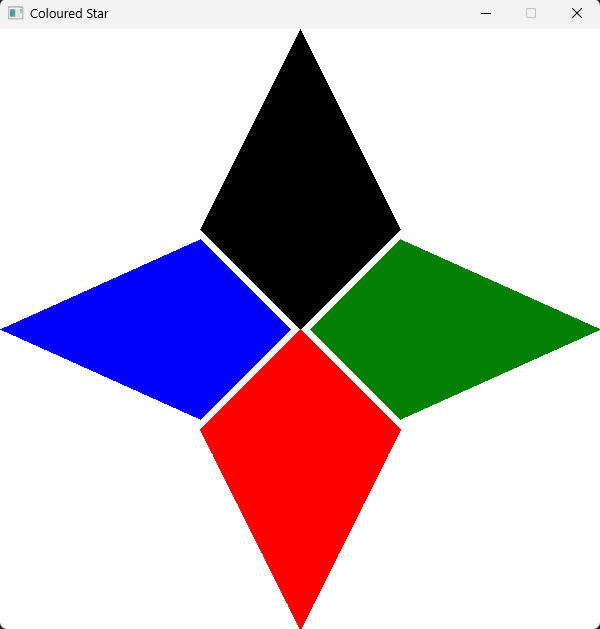
The following code shows examples of using Fill Quad to show how to draw filled-in 4 sided diamond shapes. This example shows a coloured in version of this Draw Quad usage example.
#include "splashkit.h"
int main(){    // Create 4 diamond shapes using quads    quad q1 = quad_from(400, 200, 300, 300, 300, 0, 200, 200);    quad q2 = quad_from(400, 210, 310, 300, 600, 300, 400, 390);    quad q3 = quad_from(200, 400, 300, 300, 300, 600, 400, 400);    quad q4 = quad_from(200, 390, 290, 300, 0, 300, 200, 210);
    open_window("Coloured Star", 600, 600);    clear_screen(COLOR_WHITE);
    // Draw filled-in quads    fill_quad(COLOR_BLACK, q1);    fill_quad(COLOR_GREEN, q2);    fill_quad(COLOR_RED, q3);    fill_quad(COLOR_BLUE, q4);
    refresh_screen();    delay(5000);    close_all_windows();
return 0;}using SplashKitSDK;using static SplashKitSDK.SplashKit;
// Create 4 diamond shapes using quadsQuad Q1 = QuadFrom(400, 200, 300, 300, 300, 0, 200, 200);Quad Q2 = QuadFrom(400, 210, 310, 300, 600, 300, 400, 390);Quad Q3 = QuadFrom(200, 400, 300, 300, 300, 600, 400, 400);Quad Q4 = QuadFrom(200, 390, 290, 300, 0, 300, 200, 210);
OpenWindow("Coloured Star", 600, 600);ClearScreen(ColorWhite());
// Draw filled-in quadsFillQuad(ColorBlack(), Q1);FillQuad(ColorGreen(), Q2);FillQuad(ColorRed(), Q3);FillQuad(ColorBlue(), Q4);
RefreshScreen();Delay(5000);CloseAllWindows();using SplashKitSDK;
namespace FillQuadExample{ public class Program { public static void Main() { // Create 4 diamond shapes using quads Quad Q1 = SplashKit.QuadFrom(400, 200, 300, 300, 300, 0, 200, 200); Quad Q2 = SplashKit.QuadFrom(400, 210, 310, 300, 600, 300, 400, 390); Quad Q3 = SplashKit.QuadFrom(200, 400, 300, 300, 300, 600, 400, 400); Quad Q4 = SplashKit.QuadFrom(200, 390, 290, 300, 0, 300, 200, 210);
SplashKit.OpenWindow("Coloured Star", 600, 600); SplashKit.ClearScreen(Color.White);
// Draw filled-in quads SplashKit.FillQuad(Color.Black, Q1); SplashKit.FillQuad(Color.Green, Q2); SplashKit.FillQuad(Color.Red, Q3); SplashKit.FillQuad(Color.Blue, Q4);
SplashKit.RefreshScreen(); SplashKit.Delay(5000); SplashKit.CloseAllWindows(); } }}from splashkit import *
# Create 4 diamond shapes using quadsq1 = quad_from(400, 200, 300, 300, 300, 0, 200, 200)q2 = quad_from(400, 210, 310, 300, 600, 300, 400, 390)q3 = quad_from(200, 400, 300, 300, 300, 600, 400, 400)q4 = quad_from(200, 390, 290, 300, 0, 300, 200, 210)
# Create Windowopen_window("Coloured Star", 600, 600)clear_screen(color_white())
# Draw filled-in quadsfill_quad(color_black(), q1)fill_quad(color_green(), q2)fill_quad(color_red(), q3)fill_quad(color_blue(), q4)
refresh_screen()delay(5000)close_all_windows()Output:
Fill Quad On Bitmap
Windows OS Logo
The following code demonstrates how to use Fill Quad On Bitmap to create the windows logo using four quads to represent the window panels.
#include "splashkit.h"
int main(){    // Create a window and bitmap for the window    window window = open_window("Windows Logo", 400, 300);    bitmap bitmap = create_bitmap("Windows Logo Bitmap", 400, 300);
    // Fill background with windows blue    clear_bitmap(bitmap, rgba_color(51, 118, 212, 255));
    // Draw the four Window panels    quad panels[] = {        quad_from(            85, 50,            180, 41,            85, 130,            180, 130        ),        quad_from(            193, 40,            323, 26,            193, 130,            323, 130        ),        quad_from(            85, 143,            180, 143,            85, 222,            180, 233        ),        quad_from(            193, 143,            323, 143,            193, 235,            323, 250        )    };
    // Draw each panel    for (int i = 0; i < 4; i++)    {        fill_quad_on_bitmap(bitmap, COLOR_WHITE, panels[i]);    }
    while (!window_close_requested(window))    {        process_events();        // Draw the bitmap to the window        draw_bitmap(bitmap, 0, 0);        // Refresh the window        refresh_screen();    }
free_bitmap(bitmap); return 0;}using static SplashKitSDK.SplashKit;using SplashKitSDK;
// Create a window and bitmap for the windowWindow window = OpenWindow("Windows Logo", 400, 300);Bitmap bitmap = CreateBitmap("Windows Logo Bitmap", 400, 300);
// Fill background with windows blueClearBitmap(bitmap, RGBAColor(51, 118, 212, 255));
// Draw the four Window panelsQuad[] panels = { QuadFrom( 85, 50, 180, 41, 85, 130, 180, 130 ), QuadFrom( 193, 40, 323, 26, 193, 130, 323, 130 ), QuadFrom( 85, 143, 180, 143, 85, 222, 180, 233 ), QuadFrom( 193, 143, 323, 143, 193, 235, 323, 250 )};
// Draw each panelfor (int i = 0; i < panels.Length; i++){ FillQuadOnBitmap(bitmap, ColorWhite(), panels[i]);}
while (!window.CloseRequested){ ProcessEvents(); // Draw the bitmap to the window DrawBitmap(bitmap, 0, 0); // Refresh the window RefreshScreen();}
FreeBitmap(bitmap);using SplashKitSDK;
namespace FillQuadOnBitmap{ public class Program { public static void Main() { // Create a window and bitmap for the window Window window = new Window("Windows Logo", 400, 300); Bitmap bitmap = new Bitmap("Windows Logo Bitmap", 400, 300);
// Fill background with windows blue bitmap.Clear(Color.RGBAColor(51, 118, 212, 255));
// Create color Color color = Color.White;
// Draw the four Window panels Quad[] panels = { SplashKit.QuadFrom( 85, 50, 180, 41, 85, 130, 180, 130 ), SplashKit.QuadFrom( 193, 40, 323, 26, 193, 130, 323, 130 ), SplashKit.QuadFrom( 85, 143, 180, 143, 85, 222, 180, 233 ), SplashKit.QuadFrom( 193, 143, 323, 143, 193, 235, 323, 250 ) };
// Draw each panel for (int i = 0; i < panels.Length; i++) { bitmap.FillQuad(color, panels[i]); }
while (!window.CloseRequested) { SplashKit.ProcessEvents(); // Draw the bitmap to the window window.DrawBitmap(bitmap, 0, 0); // Refresh the window SplashKit.RefreshScreen(); }
bitmap.Free(); } }}from splashkit import *
# Create a window and bitmap for the windowwindow = open_window("Windows Logo", 400, 300)bitmap = create_bitmap("Windows Logo Bitmap", 400, 300)
# Fill background with windows blueclear_bitmap(bitmap, rgba_color(51, 118, 212, 255))
# Draw the four Window panelspanels = [ quad_from( 85, 50, 180, 41, 85, 130, 180, 130 ), quad_from( 193, 40, 323, 26, 193, 130, 323, 130 ), quad_from( 85, 143, 180, 143, 85, 222, 180, 233 ), quad_from( 193, 143, 323, 143, 193, 235, 323, 250 )]
# Draw each panelfor panel in panels: fill_quad_on_bitmap(bitmap, color_white(), panel)
while not window_close_requested(window): process_events() # Draw the bitmap to the window draw_bitmap(bitmap, 0, 0) # Refresh the window refresh_screen()
free_bitmap(bitmap)Output:

Fill Quad On Window
Halved Coloured Star
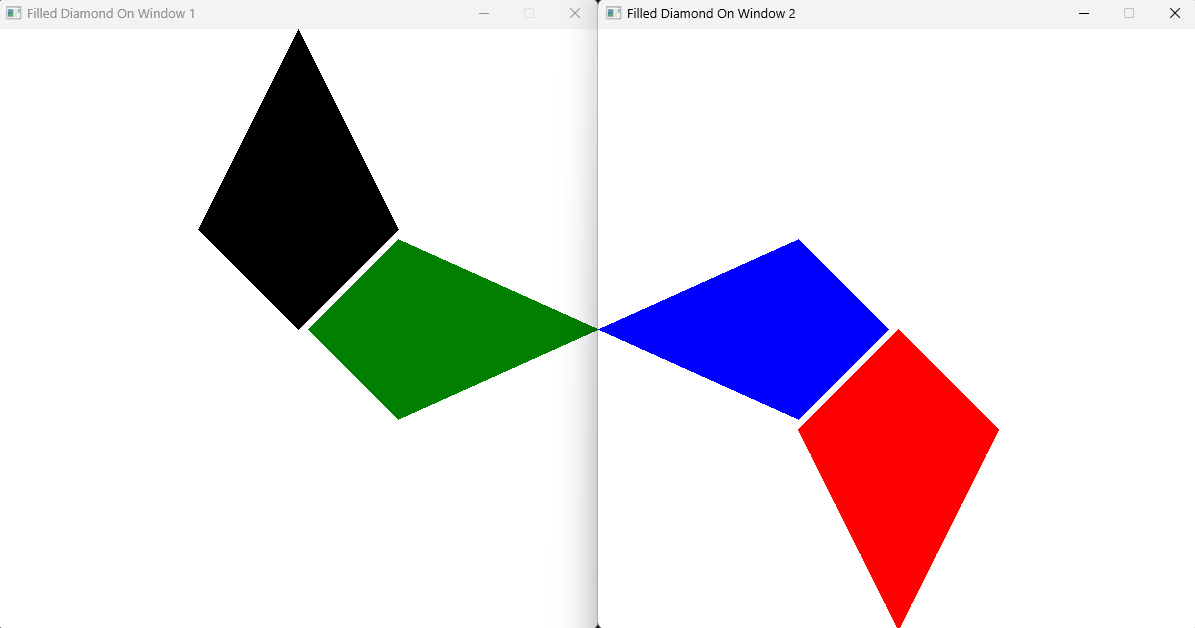
The following code shows examples of using Fill Quad On Window to show how to draw filled-in 4 sided diamond shapes to a specific window. This example shows a filled in version of this Draw Quad On Window usage example.
#include "splashkit.h"
int main(){    // Create diamond shaped quads    quad q1 = quad_from(400, 200, 300, 300, 300, 0, 200, 200);    quad q2 = quad_from(400, 210, 310, 300, 600, 300, 400, 390);    quad q3 = quad_from(200, 400, 300, 300, 300, 600, 400, 400);    quad q4 = quad_from(200, 390, 290, 300, 0, 300, 200, 210);
    // Create two Windows    window window1 = open_window("Filled Diamond On Window 1", 600, 600);    window window2 = open_window("Filled Diamond On Window 2", 600, 600);
    // Move windows to see both side by side    move_window_to(window1, 0, 0);    move_window_to(window2, window_width(window1), 0);
    clear_screen(COLOR_WHITE);
    // Draw the first and second quad on first window    fill_quad_on_window(window1, COLOR_BLACK, q1);    fill_quad_on_window(window1, COLOR_GREEN, q2);
    // Draw the third and fourth quad on second window    fill_quad_on_window(window2, COLOR_RED, q3);    fill_quad_on_window(window2, COLOR_BLUE, q4);
refresh_screen(); delay(5000); close_all_windows(); return 0;}using SplashKitSDK;using static SplashKitSDK.SplashKit;
// Create diamond shaped quadsQuad q1 = QuadFrom(400, 200, 300, 300, 300, 0, 200, 200);Quad q2 = QuadFrom(400, 210, 310, 300, 600, 300, 400, 390);Quad q3 = QuadFrom(200, 400, 300, 300, 300, 600, 400, 400);Quad q4 = QuadFrom(200, 390, 290, 300, 0, 300, 200, 210);
// Create two WindowsWindow window1 = OpenWindow("Filled Diamond On Window 1", 600, 600);Window window2 = OpenWindow("Filled Diamond On Window 2", 600, 600);
// Move windows to see both side by sideMoveWindowTo(window1, 0, 0);MoveWindowTo(window2, WindowWidth(window1), 0);
ClearScreen(ColorWhite());
// Draw the first and second quad on first windowFillQuadOnWindow(window1, ColorBlack(), q1);FillQuadOnWindow(window1, ColorGreen(), q2);
// Draw the third and fourth quad on second windowFillQuadOnWindow(window2, ColorRed(), q3);FillQuadOnWindow(window2, ColorBlue(), q4);
RefreshScreen();Delay(5000);CloseAllWindows();using SplashKitSDK;
namespace FillQuadOnWindowExample{ public class Program { public static void Main() { // Create diamond shaped quads Quad q1 = SplashKit.QuadFrom(400, 200, 300, 300, 300, 0, 200, 200); Quad q2 = SplashKit.QuadFrom(400, 210, 310, 300, 600, 300, 400, 390); Quad q3 = SplashKit.QuadFrom(200, 400, 300, 300, 300, 600, 400, 400); Quad q4 = SplashKit.QuadFrom(200, 390, 290, 300, 0, 300, 200, 210);
// Create two Windows Window window1 = new Window("Filled Diamond On Window 1", 600, 600); Window window2 = new Window("Filled Diamond On Window 2", 600, 600);
// Move windows to see both side by side window1.MoveTo(0, 0); window2.MoveTo(window1.Width, 0);
SplashKit.ClearScreen(Color.White);
// Draw the first and second quad on first window window1.FillQuad(Color.Black, q1); window1.FillQuad(Color.Green, q2);
// Draw the third and fourth quad on second window window2.FillQuad(Color.Red, q3); window2.FillQuad(Color.Blue, q4);
SplashKit.RefreshScreen(); SplashKit.Delay(5000); SplashKit.CloseAllWindows(); } }}from splashkit import *
# Create diamond shaped quadsq1 = quad_from(400, 200, 300, 300, 300, 0, 200, 200)q2 = quad_from(400, 210, 310, 300, 600, 300, 400, 390)q3 = quad_from(200, 400, 300, 300, 300, 600, 400, 400)q4 = quad_from(200, 390, 290, 300, 0, 300, 200, 210)
# Create two Windowswindow1 = open_window("Filled Diamond On Window 1", 600, 600)window2 = open_window("Filled Diamond On Window 2", 600, 600)
# Move windows to see both side by sidemove_window_to(window1, 0, 0)move_window_to(window2, window_width(window1), 0)
clear_screen(color_white())
# Draw the first and second quad on first windowfill_quad_on_window(window1, color_black(), q1)fill_quad_on_window(window1, color_green(), q2)
# Draw the third and fourth quad on second windowfill_quad_on_window(window2, color_red(), q3)fill_quad_on_window(window2, color_blue(), q4)
refresh_screen()delay(5000)close_all_windows()Output:
Fill Rectangle
Basic Blue Rectangle
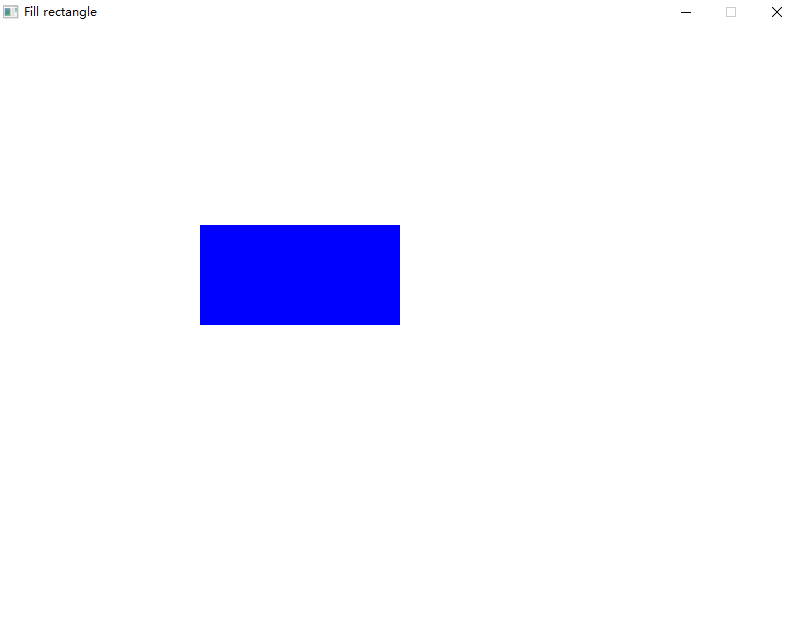
The following code shows examples of using Fill Rectangle to show how to draw a filled-in blue rectangle.
#include "splashkit.h"
int main(){    open_window("Fill rectangle", 800, 600);
    clear_screen();    fill_rectangle(COLOR_BLUE, 200, 200, 200, 100);    refresh_screen();
    delay(4000);
    close_all_windows();
    return 0;}
using static SplashKitSDK.SplashKit;
OpenWindow("Fill rectangle", 800, 600);
ClearScreen();FillRectangle(ColorBlue(), 200, 200, 200, 100);RefreshScreen();
Delay(4000);
CloseAllWindows();Output:
Draw Triangle On Bitmap
Creating a Mountain Peak
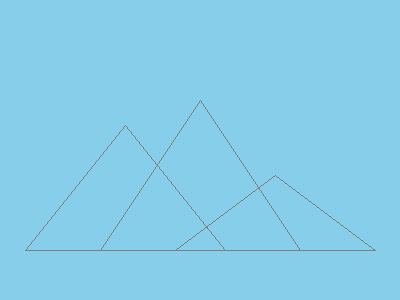
The following code demonstrates how to use Draw Triangle On Bitmap to create a simple mountain peak outline against a sky background.
#include "splashkit.h"
int main(){    // Create a window and bitmap for the mountain scene    window window = open_window("Window", 400, 300);    bitmap bitmap = create_bitmap("mountain", 400, 300);
    // Fill background with light blue color    clear_bitmap(bitmap, COLOR_LIGHT_BLUE);
    // Draw right peak (smallest)    draw_triangle_on_bitmap(bitmap, COLOR_GRAY,                          175, 250,   // Left base                          275, 175,   // Peak                          375, 250);  // Right base
    // Draw left peak (medium)    draw_triangle_on_bitmap(bitmap, COLOR_GRAY,                          25, 250,    // Left base                          125, 125,   // Peak                          225, 250);  // Right base
    // Draw center peak (tallest)    draw_triangle_on_bitmap(bitmap, COLOR_GRAY,                          100, 250,   // Left base                          200, 100,   // Peak                          300, 250);  // Right base
    while (!window_close_requested(window))    {        process_events();        // Draw the bitmap to the window        draw_bitmap(bitmap, 0, 0);        refresh_screen();    }
free_bitmap(bitmap); close_all_windows(); return 0;}using SplashKitSDK;using static SplashKitSDK.SplashKit;
// Create a window and bitmap for the mountain sceneWindow window = OpenWindow("Window", 400, 300);Bitmap bitmap = CreateBitmap("mountain", 400, 300);
// Fill background with light blue colorClearBitmap(bitmap, ColorLightBlue());
// Draw right peak (smallest)DrawTriangleOnBitmap(bitmap, ColorGray(), 175, 250, // Left base 275, 175, // Peak 375, 250); // Right base
// Draw left peak (medium)DrawTriangleOnBitmap(bitmap, ColorGray(), 25, 250, // Left base 125, 125, // Peak 225, 250); // Right base
// Draw center peak (tallest)DrawTriangleOnBitmap(bitmap, ColorGray(), 100, 250, // Left base 200, 100, // Peak 300, 250); // Right base
while (!WindowCloseRequested(window)){ ProcessEvents(); // Draw the bitmap to the window DrawBitmap(bitmap, 0, 0); RefreshScreen();}
FreeBitmap(bitmap);CloseAllWindows();using SplashKitSDK;
namespace DrawTriangleOnBitmap{ public class Program { public static void Main() { // Create a window and bitmap for the mountain scene Window window = new Window("Window", 400, 300); Bitmap bitmap = new Bitmap("mountain", 400, 300);
// Fill background with light blue color bitmap.Clear(Color.LightBlue);
// Draw right peak (smallest) bitmap.DrawTriangle(Color.Gray, 175, 250, // Left base 275, 175, // Peak 375, 250); // Right base
// Draw left peak (medium) bitmap.DrawTriangle(Color.Gray, 25, 250, // Left base 125, 125, // Peak 225, 250); // Right base
// Draw center peak (tallest) bitmap.DrawTriangle(Color.Gray, 100, 250, // Left base 200, 100, // Peak 300, 250); // Right base
while (!window.CloseRequested) { SplashKit.ProcessEvents(); // Draw the bitmap to the window window.DrawBitmap(bitmap, 0, 0); SplashKit.RefreshScreen(); }
bitmap.Free(); SplashKit.CloseAllWindows(); } }}from splashkit import *
# Create a window and bitmap for the mountain scenewindow = open_window("Window", 400, 300)bitmap = create_bitmap("mountain", 400, 300)
# Fill background with light blue colorclear_bitmap(bitmap, color_light_blue())
# Draw right peak (smallest)draw_triangle_on_bitmap(bitmap, color_gray(), 175, 250, # Left base 275, 175, # Peak 375, 250) # Right base
# Draw left peak (medium)draw_triangle_on_bitmap(bitmap, color_gray(), 25, 250, # Left base 125, 125, # Peak 225, 250) # Right base
# Draw center peak (tallest)draw_triangle_on_bitmap(bitmap, color_gray(), 100, 250, # Left base 200, 100, # Peak 300, 250) # Right base
while not window_close_requested(window): process_events() # Draw the bitmap to the window draw_bitmap(bitmap, 0, 0) refresh_screen()
free_bitmap(bitmap)close_all_windows()Output:
Fill Triangle
Basic Red Triangle
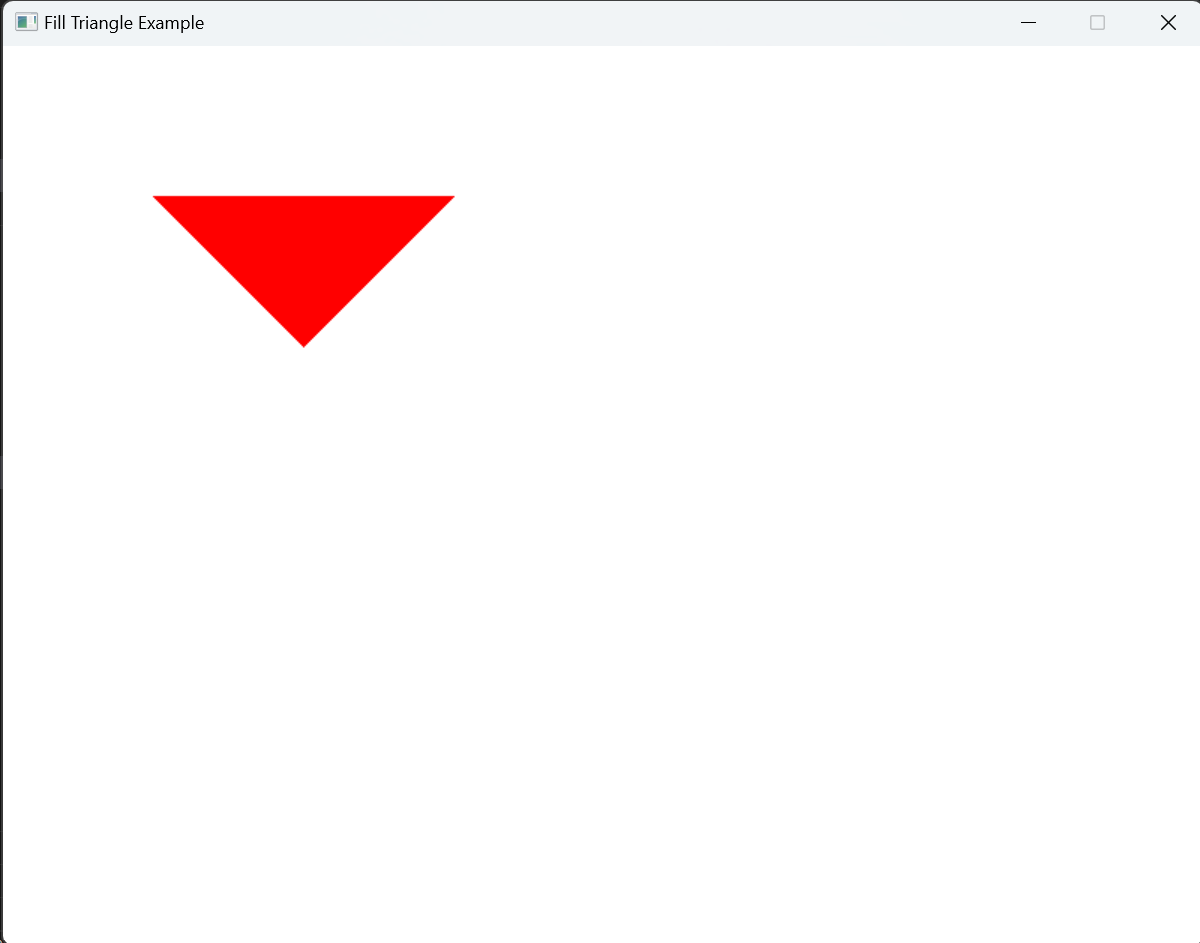
The following code demonstrates how to use the Fill Triangle function to draw a simple red-colored filled triangle. It creates a triangle with specified coordinates and fills it with red color.
#include "splashkit.h"
int main(){    open_window("Fill Triangle Example", 800, 600);
    clear_screen();    fill_triangle(COLOR_RED, 100, 100, 200, 200, 300, 100);    refresh_screen();
    delay(5000);    close_all_windows();
return 0;}using static SplashKitSDK.SplashKit;
OpenWindow("Fill Triangle Example", 800, 600);
ClearScreen();FillTriangle(ColorRed(), 100, 100, 200, 200, 300, 100);RefreshScreen();
Delay(5000);CloseAllWindows();using SplashKitSDK;
namespace FillTriangleExample{ public class Program { public static void Main() { SplashKit.OpenWindow("Fill Triangle Example", 800, 600);
SplashKit.ClearScreen(); SplashKit.FillTriangle(Color.Red, 100, 100, 200, 200, 300, 100); SplashKit.RefreshScreen();
SplashKit.Delay(5000); SplashKit.CloseAllWindows(); } }}from splashkit import *
open_window("Fill Triangle Example", 800, 600)
clear_screen_to_white()fill_triangle(color_red(), 100, 100, 200, 200, 300, 100)refresh_screen()
delay(5000)close_all_windows()Output:
Fill Triangle On Bitmap
Hooray! A Red Hat
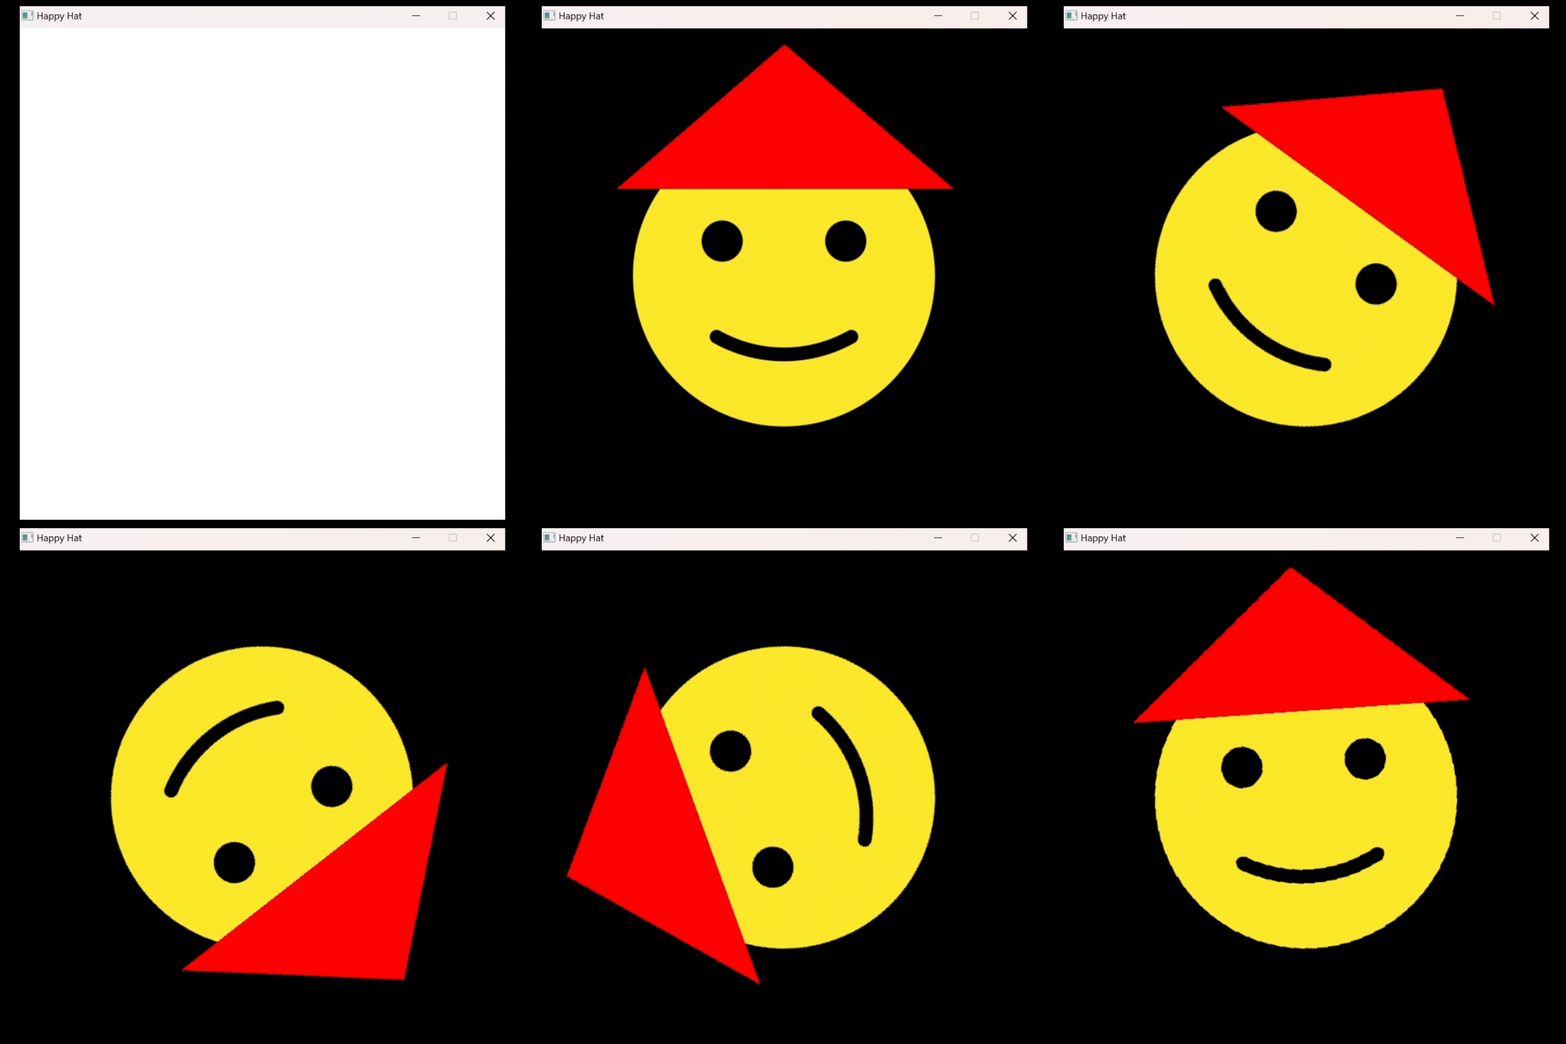
The following code shows an example of using the Fill Triangle On Bitmap function to draw a red triangle on a loaded bitmap.
#include "splashkit.h"
int main(){    // Open a window    open_window("Happy Hat", 618, 618);
    // Load the bitmaps for sad and smiling emojis (https://openmoji.org/library/#group=smileys-emotion)    bitmap sad_emoji = load_bitmap("sad_emoji", "sad_emoji.png");    bitmap smiling_emoji = load_bitmap("smiling_emoji", "smiling_emoji.png");
    // Draw the sad emoji and add a hat    clear_screen(COLOR_BLACK);    draw_bitmap(sad_emoji, 0, 0);    refresh_screen();    delay(1000);
    // Draw a triangle hat on the smiling emoji    fill_triangle_on_bitmap(smiling_emoji, COLOR_RED, 100, 200, 309, 20, 520, 200);
    // Clear screen and switch to the smiling emoji    clear_screen(COLOR_BLACK);    draw_bitmap(smiling_emoji, 0, 0);    refresh_screen();    delay(1000);
    // Spin the smiling emoji with the hat    for (int i = 0; i < 360; i++)    {        clear_screen(COLOR_BLACK);        draw_bitmap(smiling_emoji, 0, 0, option_rotate_bmp(i));        refresh_screen();        delay(10);    }
    // Free the bitmap resource    free_all_bitmaps();    // Close all windows    close_all_windows();
return 0;}using SplashKitSDK;using static SplashKitSDK.SplashKit;
// Open a windowOpenWindow("Happy Hat", 618, 618);
// Load the bitmaps for sad and smiling emojis (https://openmoji.org/library/#group=smileys-emotion)Bitmap sadEmoji = LoadBitmap("sad_emoji", "sad_emoji.png");Bitmap smilingEmoji = LoadBitmap("smiling_emoji", "smiling_emoji.png");
// Draw the sad emoji and add a hatClearScreen(ColorBlack());DrawBitmap(sadEmoji, 0, 0);RefreshScreen();Delay(1000);
// Draw a triangle hat on the smiling emojiFillTriangleOnBitmap(smilingEmoji, ColorRed(), 100, 200, 309, 20, 520, 200);
// Clear screen and switch to the smiling emojiClearScreen(ColorBlack());DrawBitmap(smilingEmoji, 0, 0);RefreshScreen();Delay(1000);
// Spin the smiling emoji with the hatfor (int i = 0; i < 360; i++){ ClearScreen(ColorBlack()); DrawBitmap(smilingEmoji, 0, 0, OptionRotateBmp(i)); RefreshScreen(); Delay(10);}
// Free the bitmap resourceFreeAllBitmaps();// Close all windowsCloseAllWindows();using SplashKitSDK;
namespace FillTriangleOnBitmapExample{ public class Program { public static void Main() { //Open a Window SplashKit.OpenWindow("Happy Hat", 618, 618);
//Load the bitmaps for sad and smiling emojis (https://openmoji.org/library/#group=smileys-emotion) Bitmap sadEmoji = SplashKit.LoadBitmap("sad_emoji", "sad_emoji.png"); Bitmap smilingEmoji = SplashKit.LoadBitmap("smiling_emoji", "smiling_emoji.png");
// Draw the sad emoji and add a hat SplashKit.ClearScreen(Color.Black); SplashKit.DrawBitmap(sadEmoji, 0, 0); SplashKit.RefreshScreen(); SplashKit.Delay(1000);
// Draw a triangle hat on the smiling emoji // SplashKit.FillTriangleOnBitmap(smilingEmoji, Color.Red, 100, 200, 309, 20, 520, 200); smilingEmoji.FillTriangle(Color.Red, 100, 200, 309, 20, 520, 200);
// Clear Screen and switch to smiling emoji SplashKit.ClearScreen(Color.Black); SplashKit.DrawBitmap(smilingEmoji, 0, 0); SplashKit.RefreshScreen(); SplashKit.Delay(1000);
// Spin the smiling emoji with the hat for (int i = 0; i < 360; i++) { SplashKit.ClearScreen(Color.Black); SplashKit.DrawBitmap(smilingEmoji, 0, 0, SplashKit.OptionRotateBmp(i)); SplashKit.RefreshScreen(); SplashKit.Delay(10); }
// Free the bitmap resource SplashKit.FreeAllBitmaps(); // CLose all windows SplashKit.CloseAllWindows();
} }}from splashkit import *
# Open a windowopen_window("Happy Hat", 618, 618)
# Load the bitmaps for sad and smiling emojis (https://openmoji.org/library/#group=smileys-emotion)sad_emoji = load_bitmap("sad_emoji", "sad_emoji.png")smiling_emoji = load_bitmap("smiling_emoji", "smiling_emoji.png")
# Draw the sad emoji and add a hatclear_screen(color_black())draw_bitmap(sad_emoji, 0, 0)refresh_screen()delay(1000)
# Draw a triangle hat on the smiling emojifill_triangle_on_bitmap(smiling_emoji, color_red(), 100, 200, 309, 20, 520, 200);
# Clear screen and switch to the smiling emojiclear_screen(color_black())draw_bitmap(smiling_emoji, 0, 0)refresh_screen()delay(1000)
# Spin the smiling emoji with the hatfor i in range(0, 360): clear_screen(color_black()) draw_bitmap_with_options(smiling_emoji, 0 , 0, option_rotate_bmp(i)) refresh_screen() delay(10)
# Free the bitmap resourcefree_all_bitmaps()# Close all windowsclose_all_windows()Output:
